I undertook many different types of experiments to give me a combined understanding of how to create a realistic scene in Maya. The was many elements which I needed to understand that would allow me to both be able to understand and know how to produce a scene of significant realism.
Gaining the knowledge to be able to undertake all of these essential experiments, meant that I had to access a wide variety of sources to acquire the information to make these experiments possible. I read through many books, accesses many websites and watched many online video tutorials. With all of these sources accessed it enabled me to not only to experiments but also to understand how and why certain things have to be done. It was a very effective decision I made to both know and understand hot to use Maya for my experimental tasks.
Reading through the books were very good at getting to understand the technical information and the inner mechanics to simulations. This gave me a huge advantage to rectifying and identifying an issue when one came up. Working in Maya is always tricky because there always is something which ends up not working which, is normally the result of one little setting not being adjusted accordingly. So understanding how and why Maya does the things it does will allow me to understand what causes the problem a lot quicker if not instantly.
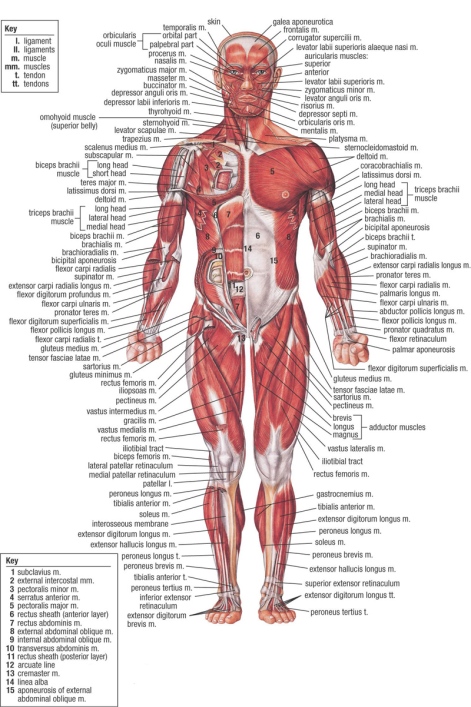
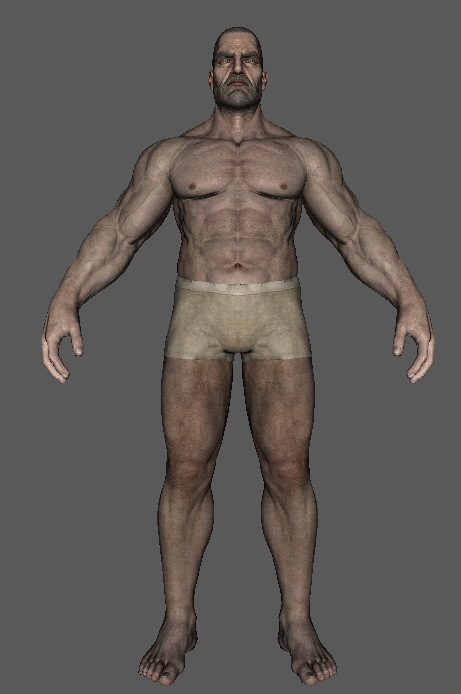
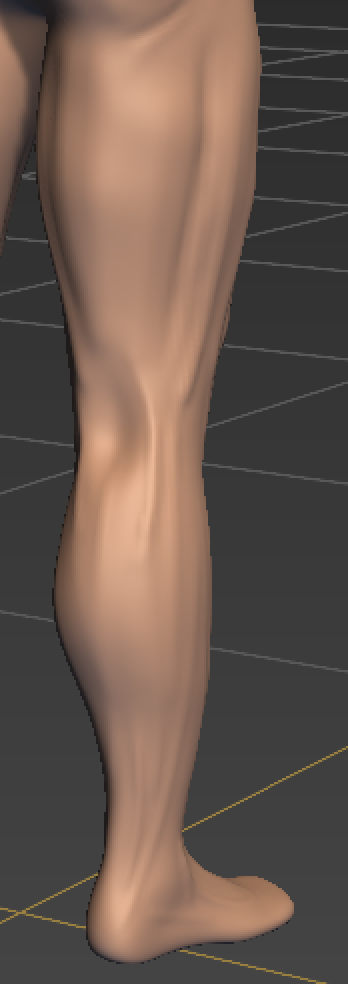
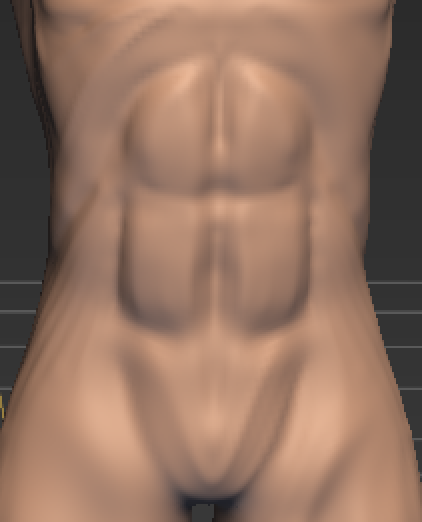
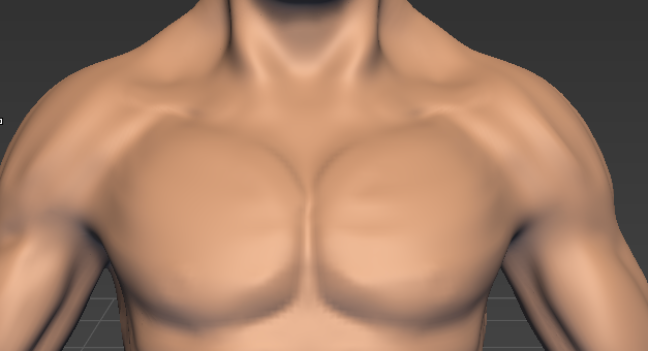
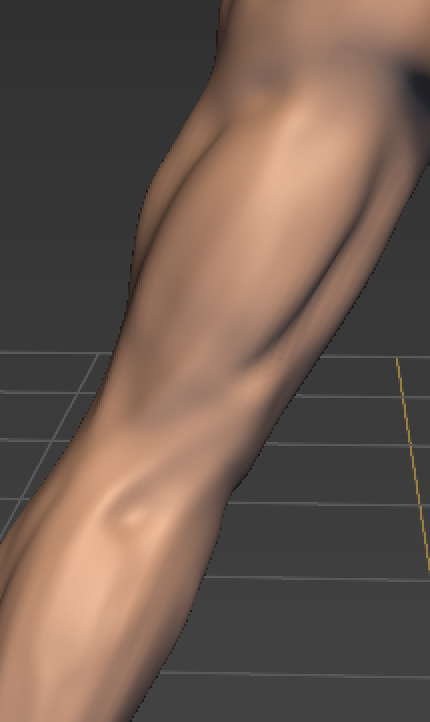
I set out to learn how to sculpt a human body in Mudbox using the muscle structure of the a real human diagram. This was achieved and ended up being a pretty accurate model. The model lacked all the fine details which would of made my final model look a lot more realistic. James Taylor was an artist who I used to help me in understanding how to sculpt human anatomy but my final result was not as technically advanced as his work is. More time and development needs to be put into future sculpts along with more precision sculpting. To be able to be an affective character model in the industry it would be expected that I would be able to sculpt a wide array of organic structures, so it would therefore be a good idea to look at other organic things to sculpt.
Looking at many industry standard charter which had been sculpted was a great way to see whats expected of game ready characters. Some characters such as Naughty Dogs Nathan Drake character, are far superior to the level at which, I am currently sculpting at. This does not mean that my models are not industry ready as my models would be at a level suited for games such as Ark Survival: evolved which is still a current generation game.
Physics was a very unique learning curve as it was not sculpting nor was it modelling. The whole physics process was a complete technical learning curve with not much room to be creative. My technical approach to understanding of how physics both work and react in real life was a great way to approach understanding physics in Maya. Maya is a programme designed to be able to simulate almost anything which, includes the real world. When I developed an understanding of physics by reading theories by Albert Einstein, I was able to then take what I learnt and use it as reference in Maya
My physics simulation were both creative and a good way to demonstrate how physics simulations work. I used very different simulations to create a broader spectrum of what can be achieved using Physics. Some of my simulations were quite inaccurate when it came to gravity which was a problem I could not solve. I deeper look into creating physics may show me how to get around this or maybe my Maya is making inaccurate calculations due to some deep setting. A reinstallation may be needed to rectify this problem. I set up to be able to recreate gravity in Maya which was achieved through matching gravitational settings, to the real world gravitational force.
Experimenting fur was hugely successful due to the rang of diffrent styles of fur I was able to recreate based on industry examples. Using industry examples was an effective way to ascertain wether or not I was able to create fur to the same industry level. Fur was a very easy aspect of Maya to work with due to the simplicity of the tools in Maya but still provide visually impressive work. I did not mange to match all of my fur experiments to the references, but I was not far behind industry professionals who created the referenced work.
Using a wide range of references really allowed me to conduct various types effective experimental work which allowed me to develop both technical and thinking skills. I have learnt to be able to approach work in the most efficient way whilst also being able to create technically challenging work. I was able to use aesthetically driven ideas and achieve them using technical skills.
Overall I managed to meet objectives effectively ,which would enable me to provide work to industry expectations. My objectives evolved around the realms of realism which would be achieved if objectives were met. Understanding what makes work look real through analysis, gave me the opportunity to work towards these industry level pieces of work.
Objective: To be able to create grass which could be included into a games environment to add beauty and natural life. This will need to be achieved using a technique which would be industry standard for games assets.
Grass and other naturally occurring forms of life, are big a big part of games, animations and films alike. Although it may seem to go unnoticed in lots of of final products, I feel that they are a very important aspect.
Organic plant life gives the ability not only produce a visually pleasing peace of work but a piece of work that the audience can see and believe.
“Creating Games with Unity and Maya: How to Develop Fun and Marketable” 3D Games By Adam Watkins writes ” grass is an appealing part of a terrain as it is low-poly and can really bring a scene to life”.
Understanding how grass looks in games is a very important task I have had to undertake to understand just how it fits into its environment. I have to also understand the technical issues behind grass as its normally comes in abundance rather than a small patch. This means that I would need to have a lot of grass generated for scenes which could potentially cause the game to run slow.
I wanted to look at the latest possible game to get get a rough idea of just where the development of grass is at in games. The game Mafia 3 which is scheduled to come out in late 2016 was a perfect example to look at. Its a game set in an urban environment with some grass land areas. 1:56 – 2:16
To create grass I decided to do it in a way which would create grass in 3D space whilst the other technique would be to create grass which appeared 3D. The reason for this is the 3D grass makes a game look a lot more realistic and beautiful.
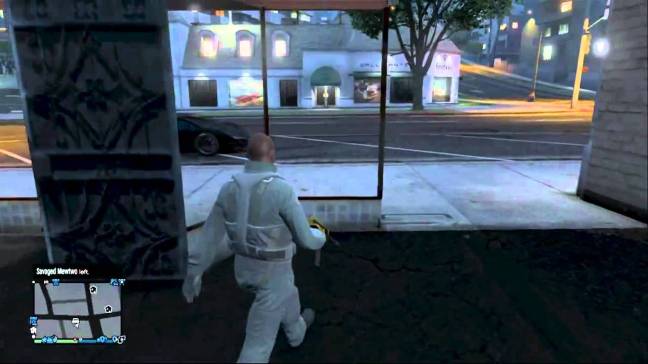
This is a shot from the video game Grand Theft Auto: 5 which shows the differences in graphic settings. The normal setting has a very flat grass land which does not look alive with life, meanwhile the other setting (ultra) looks a lot more realistic and beautiful. This is due to the grass which has been created in 3D and now extrudes from the ground rather than having a a flat ground.
GTA = Grand Theft Auto
If you look closely at the grass you can see that its actually just image planes which have been positioned in a way which makes them appear 3D from certain angles. If you was to look at them from a birds eye view all you would see is the edges of the image planes which the grass textures are applied to. The reason that GTA chose to create this type of grass is to ensure smooth running of the game. A few image planes have a a very low poly-count which allows for smaller game files and easier game processing. GTA is a massive open world game which is covered by a lot of grass so if they chose to use geometry to build up the grass it would take a super computer to run the game effectively.
Grand Theft Auto: 5
So I decided to recreate the successful and efficient approach that GTA took when creating the grass. This is a no brainer to go down this path as its a very successful way to create realistic grass whilst whilst keeping down running specs requirements. Being able to create a realistic environment and keeping down the processing demands needed to play it, are industry standard targets.
I decided to get a random .PNG image of the internet so that I could apply it to a basic polygonal plane. The image has to be a .PNG file extension so that it has a transparent background, which would them only display the grass. A polygonal plane has a minimal poly-count which is ideal for creating low-poly assets. I used the projection mapping to project the image onto the face of my plane so that I could position it effectively.
So this is what it looks like when rendered out. It looks like nothing spectacular but without a doubt it looks like grass. This grass is 2D which would mean that if the camera was to rotate enough then the grass would disappear
To get around this I then had to duplicate my grass plane and the rotate the duplicates on its axis. This is so that when the camera pans around the grass planes,there will always be one in shot. Even with multiple grass planes there is still a significantly lower poly-count than if the grass was made using geometry.
This is the result of planes positioned together to create the illusion of 3D. The final output is much better than the single plane by itself due to the added depth which is added. This is ideal for a game as it creates a visually impressive grass whilst maintaining a very low processing load.
For experimental purposes I still decided to create grass using geometry to see if there is a significant difference between using geometry and images. Its quite obvious that if a lot of detail was put into single strains of grass that there would be huge detail benefits but it would be unrealistic for a games environment. No game would ever sacrifice a poly-count limit to create high detailed grass. All games work to a poly limit which if passed will create a game which would not be easy for its targeted platforms to run. Here is a website which lists the poly count of many new games:
This tutorial was very helpful in helping me understand how to approach creating grass using geometry.
To create I used paint effects in maya to draw out grass. When drawing out the grass it important to consider the path which you choose to paint out as it can not be changed once painted. Once I used the paint effects tool to paint out my grass I then had to ensure that I converted my paint effects to polygons. If this is not done then the f=grass can not be rendered out as there is no poly-surface for Maya to render.
As you can see from the grass there is a significant increase in the polygons needed to make up the grass in comparison to the textured grass. This is a would be a huge issue when it comes to processing and playing the game due to the demands processing this kind of geometry would entail.
To my surprise the final output was much worse than the textured grass even though more detail was applied to this grass. The render looks like something you would see from a very old computer game. Having this kind of final output with a high poly-count it would not make sense to use this technique in future projects.
This shows the amount of faces, edges and vertices which would not be efficient nor would it be industry practice for a games environment.
I have created a slide of other textures which I used to create grass to see how the looked when rendered. I think it was a good idea to experiment with different textures as most games worlds would have different types of grass.
This slideshow requires JavaScript.
Critical review
I was able to able to meet my objective and create a games ready grass asset. This was achieved using a a method which allowed the creation of visually accomplished grass whilst maintaining a low poly-count. I was able to replicate grass the same way that Grand Theft Auto: 5 does. This means that my technique and experimental grass would be industry ready for a game.
I will be experimenting with colours,Fur/Hair,dynamics and lighting. These aspects put together right can help create a realistic and diverse piece of work.
I have set out objectives that I will need to achieve to be able to to take away desired skills that will be required for future projects.
Objectives:
Experiment with different types of colours to get and understanding of how colour properties.
Use Maya to get an in-depth understanding of how fur/hair can be created.
Understand how to create physic based simulations in Maya.
Create a fluid simulation using a emitter and a collider.
Create both a static and dynamic ocean.
To be able to create a professional looking scene using Image based lighting.
Use Light fog to create volumetric lighting.
Create a scene that contains curtains blowing in the wind.
Materials
Objective: To study materials in Maya and develop an advanced understanding of their properties.
Colour is a simple yet very important part in creating feel in a scene. Most games and films stick to strict colour boards so that a desired look and feel is achieved. A basic example of this is using red to express anger and blue being neutral. This is all down to something called “colour theory”.
Colour theory is the process of mixing colours from a specific colour combination to create a uniform look. Understanding and abiding by a colour theory will allow me to use colours in relation to each other and prevent colour clashing.
I undertook the task of experimenting with colours in Maya to get an in-depth understanding of the colours and their properties. Being able to understand the properties of these colours will allow me that I am well educated and able to make effective decisions on future projects.
Having a basic understanding of the properties of colours in Maya would lead to poor decisions being made when choosing what colours to apply to models.
In this test here I wanted to create a chrome like colour with high reflectivity properties to understand how it reflects its surroundings. I needed to create an Image Based lighting set-up so that there was something for the chrome colour to reflect. Without this in place, there would be nothing for the material to reflect.
Mia_material (chrome colour)
The material I used is called a Mia_material. This setup is great for rendering done with mental-ray but can not be used with any other rendering engine. The default properties of this type of material is automatically very reflective with the reflectivity level set at the factor of 1, which is equivalent to 100% reflectivity.
Reflectivity level
“Mastering Maya 8.5” By John Kundert-Gibbs writes about how about the principles of reflectivity in colours in Maya on page.385. He states” The reflectivity attribute governs how much reflectivity a material has and reflected colour, exactly what the material reflects”.
I wanted to use a spotlight to light up diffrent materials independently so that I was able to see how they appear on a blank canvas. This was so that I could get a indvidual feel of each type of material. I chose a spotlight as it would show the specular properties of each material effectively.
This is a list of the materials used in the above test that I liked:
Anisotropic – This is a unique material due to specular fall of point which appears as a wave, apposed to other materials which have a specular single point. This can be good to create a certain type of look which a single specular point would not be able to achieve. This is due to the fact that this material is Anisotropy which means, that its not directionally dependent like Isotropy based materials.
“Mastering Maya 2009”By Eric Keller page 556, gives examples of the materials that have Anisotropic properties. “brushed metal, hair and satin are all examples of materials that have anisotropic specular reflections”.
Blinn – This material uses advanced mathematics to calculate more accurate reflections. This would be a good material to use to create hyper-realistic scenes in Maya.
“Advanced Maya Texturing and Lighting”By Lee Lanier elaborates on the Blinn properties. “The Blinn material in Maya uses the Eccentricity attribute to control specular size and the specular roll of attribute to control specular intesnity”.
Mia-Material – This is my favourite material within maya due to its very advanced properties. This material allows you to manipulate the properties to create materials which look like real life materials. some of the materials which can be made very effectively are copper, chrome, metal, glass and many more. This is due to the powerful rendering properties built into this material.
“Mental ray for Maya, 3ds Max, and XSI: A 3D Artist’s Guide to Rendering”By Boaz Livny page 407 gives a more a technical description of the properties of this material. “The mia material is a monolithic(including photons and shaders) physically accurate shader that emphasises BRDF functionality with respect to correct light reflection and refraction, as well as energy conservation and light absorption”.
Critical Review
I was able to see experiment with materials to test their properties but the most important part of this was being able to understand the colours. I was able to learn about the colours and the unique properties which make them up. Learning this will allow me to appropriately choose the best materials to use in future projects.
Understanding materials properties will allow me to choose that material based on its properties to create a realistic material. Using the wrong material will create a undesired look so it was a important learning curve for me to understand materials and their properties.
Lighting
Objective: I will create volumetric lighting used advanced Maya lighting properties. The lighting should look advanced and realistic. I will also experiment with Image Based lighting to attempt to create a realistic render.
I believe that lighting is the most important aspect of a scene. When a scene is poorly lit it creates a very poor final output. I have seen work from people that contain very poor models but amazing lighting which still has an outstanding final output due to the lighting. Lighting is a very powerful tool that can be the difference between a great piece of work and a poor piece.
Experimenting with lighting will give me the in-depth understanding of how light works and reacts within Maya. This will give me an advanced understanding of the diffrent types of lights within Maya and the properties of them. Understanding the properties will allow me to manipulate lights to create a look which, I feel is adequate.
“Those who realise the importance of lighting can appreciate the importance of a systematic approach to lighting. Without light the entire contents of the world could not be appreciated visually”.” The Art of 3D: Computer Animation and Effects”By Isaac V. Kerlow page.211.
IBL= Image based Lighting
I wanted to start my experimental lighting using a indirect lighting approach called Image Based lighting. Image based Lighting uses a an image wrapped around globe like shape to light a scene. The IBL node can understand brightness values contained within the image used then interpret these values as light intensity which will be displayed when rendered.
In this image you can see the the globe like shape which is the body of the IBL. I created a basic surface along with a glass type shape which I could use to to show to take advantage the IBL lighting.
The final result was to a professional standard with the render falling into the realistic rendering category. This a advanced achievements but not due to the models but due to the lighting. The lighting is what made this scene look very realistic and create a render which could be mistaken for real.
The reflections were highly accurate which was mainly due to the table material. Reflecting the IBl was a great tactic in making the scene look real. There was also the task of ensuring that the caused by the glass was achieved.
This tutorial shows the process needed to create a realistic interior rendering using IBL. He talks about deleting the Maya default lighting which automatically lights a scene. If this is not done then the scene is lit by both default lighting and IBL. This was very important to know as its very easy to forget about the default lighting preset which, lights every scene automatically. Not turning this of will not create an a scene with inaccurate lighting.
This is a turn around render which is achieved using IBL.
Brief Review
As much as I as impressed by the IBl test, there is still room for improvement.
The biggest flaw was in the turn around video of my scene. The lighting reflection on the table is far too bright and blurred. This ruins the entire look of the render as it stands out. This could be rectified by adjusting light exposure and editing the table material properties.
The reflections on the table from the IBl were highly accurate along with the refraction on the cup.
I wanted to create a room with many windows that would appear to look out into the world using IBL. The IBL image would act as a canvas so that when you look out of the windows it seems as if there is a world outside.
The IBL image by itself was not enough to light the scene so I had to add a directional light which, I positioned to match the direction of the sun on the IBL image.
brief review
I was not impressed with the final output using this IBL set up due to the poor final output. The colours of the interior look very bland whilst the IBL texture looks very washed out and dark
Volumetric Lighting
I wanted understand how to create volumetric lighting as I think that it looks very effective when used its used. Lighting by itself can be quite boring although there is good results there is no real 3D element to it. Volumetric lighting manages to feel that void using something called Light-Fog.
Light-fog is when the light waves are slightly visible in 3D space. In this image taken from the game Metro 2033 Redux you can see the difference in lighting on either side of the image. The left side of the image looks very flat and 2 dimensional in comparison to the right side. Th reason for this is due to the volumetric lighting on the right side.
The light appears to be in 3D space due to the light-fog thats been added to the lighting.
“Mastering Maya 2009” By Eric Keller is a great book for getting to understand how volumetric lighting can be created. he explains “The way that Maya handles volumetric lighting is to attach light-fog to a light”( page.462). This may seem like a very simple explanation yet it provides me with the information on how I can create volumetric lighting by simply adding light-fog to a light.
I decided to try and recreate this type of lighting in Maya using by creating light-fog. Light-fog is a properties of a spot light which can be easily created in Maya.
This is an image of the spot light properties. You can see that under the light effects tab that there an option to add light-fog. SO when you choose to add light-fog, this will then create volumetric lighting.
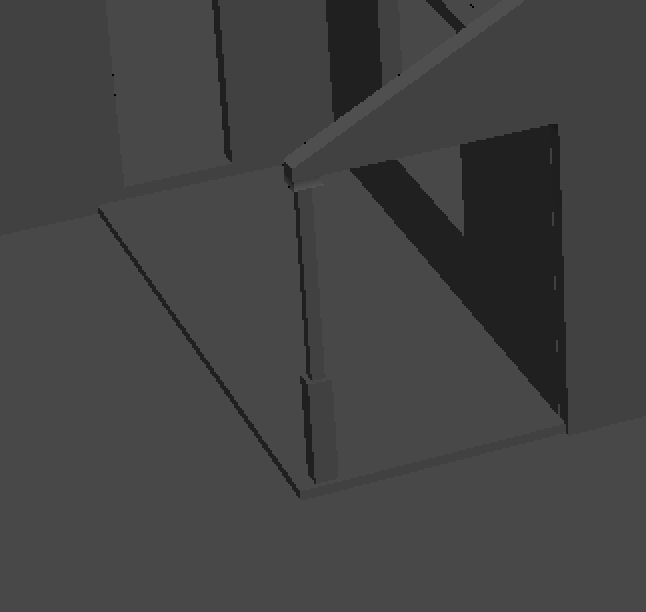
Rather than just test volumetric lighting in a blank scene, I decided to create a very basic scene to test the effects of light-fog. In the video you can see how I created a very basic scene the positioned the light in to its effective position.
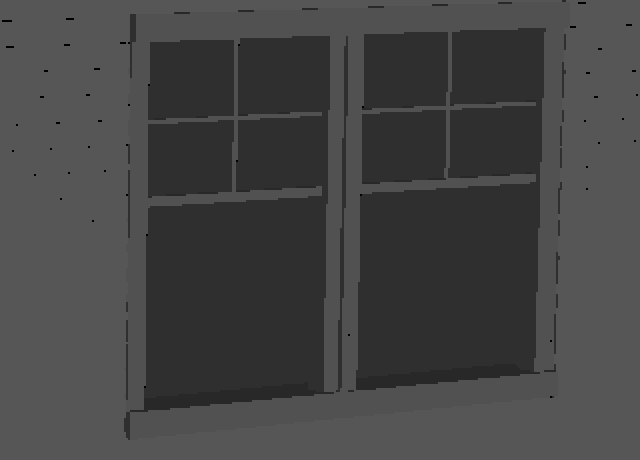
I wanted to create a window with a frame so that the light-fog would be broken up. This would make the lighting look a lot more volumetric and well accomplished.
You can see here the final renders from the volumetric lighting scene that I created. The light-fog has been successfully cast by the spot light which, has then been broken up by the window frame.
I decided to turn up the fog intesnity to see what the outcome would be and this was the result:
Critical review
I was able to gain the understanding of how to manipulate the spot light to create very effective volumetric lighting. The final output was a a great achievement in trying to create realistic volumetric lighting.
The layout which I created to test the volumetric light was very effective as it created a really dynamic scene by breaking up the light-fog.I think that adding colour to the scene would of made the final renders look a look more visually entertaining.
I was able to meet my objective and create a realistic render using Image based lighting. It will be required of me if I was to do future projects for product design companies which expect realistic renders to be conducted. This was a huge technical accomplishment for me as its the most realistic render I have ever been able to produce. This displays how my technical skills have been developed during my lighting experiments.
Objective: To be able to create realistic fur/hair which would be suitable for the industry models. I will match industry standard models for my fur experiments as they will provide a realistic and industry level reference.
Hair/Fur
Hair and fur are a very complex part of Maya in terms of processing and getting right. There is so many properties to be controlled when creating hair or fur. Once you have created the desired look, you then have to wait a very long time for Maya to render it out due to the complexity of it.
“Mastering Maya 8.5”By John Kundert-Gibb provides a very informative explanation of how fur and hair is created in Maya on page.758 . He explains ” Fur is is mapped onto a single or multiple NURBS or polygonal surfaces”. Understanding that you need to start of your fur/hair creation with a polygonal or NURBS surface is a very easy thing to miss out on.
When I first began looking into how to create fur and hair, I was shocked to find out that I needed a surface to start with. I thought that it would have been a process of painting on hair or a similar procedure.
Before I began my experimentation I wanted to watch some videos to get a visual understanding of how I could approach creating hair and fur.
This was a great yet simple video which showed the process of using a basic polygonal sphere as a base for creating fur. It was a very novice tutorial but explained the basics very well.
The bear in the movie Open season is a great example of fur being used in the professional industry. The fur is very well created and makes the bear look like an actual bear. This look could not have been achieved if no fur was added to him.
The reindeer also from Open Season also has fur applied to him which is a lot let obvious but still a visual achievement. The light would not refract along the skin and scatter across him if he did not have fur which would make him look like a bald dog.
A look at the creation of Open Season allows you to get an appreciation of how the fur added to bear makes a big difference. In the video you get to see the bear with no Fur at all as he was being animated. Having fur visible whilst animating would be extremely difficult, as the computer would move very slow when playing back the animation.
I created a polygonal cylinder for which I would use to began my experimentation of creating fur and hair. You can see that there is plenty of properties that can be edited in the attributes editor for the fur. Creating the right kind of of will take a lot of playing around with the settings to get the right look. For example if you wanted to create a very scruffy dog, you would need to increase the value of the scraggle properties to create a messier and less uniform fur.
These are all of the properties of the fur which I will be adjusting and experimenting with to try and create a certain type of fur:
This is the maya view of what a polygonal cylinder looks like once I have applied fur to it:
This is my experiment in trying to recreate the bear fur similar to what the bear in Open Season had. it does look very similar to the fur which I was trying to replicate but not exact. This is because the density of my fur was not as great and the individual hair size on mine was a lot thicker.
Bringing up the hair density, increasing population and hair size would have created a better result.
I found this image of a chick created in 3D on http://www.turboquid.com. I wanted to try and replicate the chicks fur as it looked very good. Understanding how to create soft fine hair like this would be beneficial to future projects.
This was my result from trying to recreate the chicks fur:
Chick fur experiment
My result was not too far off but lacked the same fineness that the chick’s fur had. To achieve the same colour it needed colour ramp to create a fade point in the colour so it would match my intended target a bit more.
The gorillas in Tarzan,2014 were very poorly created. The artists have tried to achieve a realistic look but have failed as the gorillas look like 3D models. What is good about them is their fur. The fur has been well developed and looks quite real.
I tried to recreate this fur but did not do too well. I was not able to achieve the same look no matter what properties I changed. I was also not able to understand what was needed to achieve the same look.
Gorilla Fur experiment
This lion form the movie Animals United,2010 ha s avery unique looking lion with a special mane. The main is not the typical giant mane that makes a lion look really beastly and fierce, but rather looks like a kind of comb-over hairstyle.
I wanted to try and create this type of lion man without the slick.
This was my result which was nowhere near the reference used. I tried to create a wavy type hair as apposed to really rough and messy which was evident in my final result.
Lion Mane experiment
I saw this image when reading an article the Telegraph website a link to the article can be found here: on http://www.telegraph.co.uk/news/picturegalleries/picturesoftheday/11371384/Pictures-of-the-day-27-January-2015.html?frame=3177543
This image of a polar bear on the london underground really caught my attention as i initially thought that it was real. thinking it was initially real shows that the the model is well accomplished and managed to fool me into thinking it was real.
This made me want to try and recreate the fur on this polar bear as I find it very amusing and visually pleasing.Most polar bears have diffrent types of fur which varies in shades of white.
This is my experiment of the polar bear fur. You can see that mine does not look as the reference polar bears fur. I used the scraggle properties to try and make it appear as soft as possible but this was as soft as I could achieve.
Polar bear experiment
This is a very popular kids tv show called Shaun The Sheep. I started looking into animated sheep as the scraggle property on the fur attribute editor gave me the idea to create sheep fur. The sheep in my reference doe not have any real fur but is instead textured.
Using the polar bear fur that i created for a previous experiment, I increased the scraggle point to its maximum value. This created what looked like a very scruffy wool type fur. I think it would work very well as fur on a sheep.
I created a test using hair and decided to create an animation out of it. I wanted to create a simulation of hair growing using keyframes. Doing this experiment would allow me to see how hair in Maya changes as it grows longer.n To do this aI created a basic sphere which would be the base mesh for my hair.
Once I had created my hair I then went in the length property and set it to its lowest point
I then set a key on that property to keyframe it at that value.
After I done that I then increased the hair length value and key framed it again at a later point on the time line. This meant that from the frame where it starts the fur will be short and get longer until it reaches my set key frame later down the time line.
This was the result:
Critical review
I wanted to gain and in-depth understanding of created fur in Maya which was achieved. I was able to create certain types of fur which matched certain animals from films and other industry models. I used multiple references from industry work as references as it was a great guideline to creating industry standard work.
Matching my fur creation skills to these industry standard models was a great achievement. It required sophisticated manipulation of the settings to match the reference images.
My fur creation still needs to be worked on very thoroughly so that I am able to match any type of fur with the up most accuracy. This was evident when I failed to replicate some types of fur in my experiments.
Dynamics
Dynamics are a great part of Maya which allows you to create a scene which is alive and moving without the use of animating. Dynamics are all around us in the real world such as wind, water, clothing and boring old gravity.
These aspects are what make up the real world so being able to understand these things and recreate them in Maya would be a huge advantage to creating a realistic environment. To help me understand of to understand how to make these elements come to life in a scene I will experiment in Maya trying to create realistic dynamic simulations.
Objective: To be able to create a realistic water simulation using Bifrost. The simulation will need to be include at least 1 emitter and 1 collision to create a realistic water collision.
Fluids
The best way to create realistic fluid in Maya is to use a plugin called Bifrost. Bifrost is a dynamic particle system that is used to create effective water simulations.
I started off by watching two very tutorials on Bifrost created by a member of the Autodesk team who created Maya. I wanted to watch their tutorials as they will know why everything those what it those which would aid me in creating real simulations and understanding the inner mechanics.
This was a tutorial created by a random artist on youtube. This tutorial caught my eye because of the video thumbnail which looked very good. Understadning what the final output of a tutorial will be is a great motivation booster. Its very easy to begin watching a tutorial and become bored and lose interest. SO knowing that there is a greatness at the end will, lead me to continue watching it till the end.
This is a article from the Autodesk website which explains what Bifrost is and the objects involved in the simulation:
Bifröst Objects, Nodes, and Attributes
The effect of a Bifröst simulation is controlled by multiple attributes on different objects and nodes in a scene. As you edit and refine a simulation, you will need to adjust attributes in several places.
There are three Bifröst objects involved in a simulation:
The container object (for example, bifrostLiquid, bifrostFoam, or bifrostAero) holds the container node, which contains the global controls for the simulation such as the voxel resolution and gravity vector. It is represented by a small icon visible in the viewports. Like the bifrost object, moving the container object has no effect.
The bifrost shape object is a child of the container contains the bifrostShape node, which is the representation of the data generated by Bifrost. You can select it by clicking on its bounding box in the viewport. You can control its appearance in the viewports, and in addition you can render it directly. Moving this object has no effect on the simulation, because all computations are performed in world space.
The bifrostMesh object is a polygon mesh that can hold a polygonized version of the surface for rendering, export, or other purposes. By default, it has no polygons until you activate meshing. It can be moved like any other Maya mesh.
In addition to the Bifröst objects, there are typically several Maya meshes involved in a simulation. These are meshes that you add to a simulation, for example, as emitters, colliders, and so on. When you add a mesh to a simulation, a Bifrost section gets added to its shape node. You can modify these attributes to control the effect of that particular mesh on the simulation.
After understanding the objects needed to create a simulation I started my experimentation with a a simple water test. I will explain the process which I took to create my first experiment. It proceeded as following:
1.) I first started by selecting the Dynamics tab from the menu selection to bring up the dynamics menu. The Bifrost tab is not visible unless the dynamics menu is selected.
2.) Once I was now on the dynamics menu, I selected a cylinder which I had created earlier. This cylinder is what will emit the liquid.
3.) Whilst selected on the cylinder, I selected the create liquid option on the Bifrost drop down menu. This will turn my cylinder into a a liquid emitter.
Once I had applied the the create liquid option to my cylinder it then become a emitter. There is clear particles covering the cylinder along with a process box.
On the timeline there was a green loading bar loading up the tike line and this was the computer, computing the fluid simulation.
4.) With the process box on the cylinder selected, I then also selected the table which I previously made. With both selected I then Selected Add Collider from the Bifrost drop down menu. This will make the fluid which is emitted by the cylinder collide with the table in opposed to just falling straight through it.
A good way to save Ram(random access memory) was to compute the simulation process to the GPU(graphics processing unit). this will take the load of the RAM which will stop your computer from slowing down.
When the simulation is computed to the GPU the timeline will go from green to blue.
My final output looked very good and the fluid looked very dynamic and dispersed the way water would in the real world. The water spreads out over the table very smoothly like fluid which is just the way it would in real life.
I wanted to then try an experiment of making the emitter emit water into a glass instead of falling onto the table. The result was very cool although the water properties need a lot of work to make it look like real water. The dynamic properties of the simulation were very accurate.
Critical review
I was able to create a very realistic water simulation using Bifrost using a emitter and a collision object which was my objective. Doing this has enabled me to understand how to how Bifrost water moves and reacts once it collides with a object.
This is a very advanced simulation procedure which was achieved through rigorous experimentation with the liquid settings. Not only this but there was a huge delay with trying to establish what looks good as there was longer render time in between changes.
This kind of simulation is heavily used in the industry in both games and films to simulate water effects. In the film 2012
Oceans and ponds
Objective: To be able to create a ocean an ocean which will simulate a stormy ocean. To be able to create a pond and have a wake which will break up the water.
I wanted to be able to create both a ocean and a pond. This is because it will allow me to create lakes,ponds and oceans in future projects. Most of the planet is covered in water so more than likely I will run into the task of modelling an environment that has one of these elements in them.
I started this experiment by first looking footage of the real life ocean as well as a static lake. Understanding how these move. look and feel is a vital part of being able to effectively create them in Maya.
This is s special effect from the film the perfect storm. You can see that the wave looks very realistic due to its colour, texture and movement.
“Mastering Maya 2009”By Eric Keller writes describes what on ocean is in maya on page 927. “The ocean fluid effect uses a surface and a special ocean shader to create a realistic ocean surface that can behave dynamically.”
So this means that and ocean in is just a surface with the right type of shader that looks like water applied to it. Using different shaders would lead to different results. This is because the shader will be the surface texture so having a particular shader will make the ocean look like that.
I started my first experiment by creating a pond. This was the process which I took to create the pong:
1.) Under the under fluid effects tab, select pond and the create pond. This then creates a pond.
PondRender of pond
2.) I then creating a wake from the pond menu. I decided to create wake as this would allow me to deform the water and create a dynamic simulation.
This is the wake which is a sphere shape which, reacts with the pond surface when contact is made.
You can see from this image what happened when I experimented with key-framing the wake moving through the pond. It created a really cool simulation which looks similar to a boat travelling through the water.
Wake keyframes
This is a video of two different experiments which I conducted. I wanted to understand how the water would deform if the wake was to slowly move through the water in comparison to moving fast through it.
You can see that the water becomes a lot more erratic when the wake moves through the water at a faster pace. This was expected as it meant that the water was being broken up a lot faster and more violently.
When the wake moves slowly through the water, its a lot more controlled and less erratic. This would be good for creating a neutral scene with a boat or something moving slowly along the surface.
I wanted to now experiment with creating a ocean. The ocean will not be so simple as its more dynamic and alive. This is because oceans are continuously moving around which generates lots of waves.
I played around with the wave length properties to create waves.
Wave lengths
I then also added foam to the ocean which would create the effect of the waves splashing around creating foam. This is evident in my video which I watch about waves.
Foam emission properties used to create foam
You can see my final shader in the sample box.
This was my ocean after I experimented with the wavy settings. I was able to create very big waves which are very similar to a stormy type ocean.
This was my final output after adding foam and creating waves. You can see that the result was very well established. The ocean dynamics are just the same as a stormy ocean in real life. Adding the foam was really effective in making the waves simulation look more realistic.
Waves render
Critical review
I was able demonstrate a deep understanding of how to create a calm pond and also a stormy ocean. These two are very different from each other as they have completely different characteristics. This was purposely done by me so that I was able to understand how to create two very different water simulations which means that any other type of ocean/pond would full in-between.
So I now have the skill set to be able to create any type of ocean whether it be a still pond or a raging ocean.
I was able to use a wake to break up the water which could serve as a great boat simulation. The wake can be added to a boat to make it appear to break up the water. I will be able to create any object and now make it interact with the water .
I am now able to create realistic ponds and oceans which was my intended objective. Having this skill will enable me to create a diverse environment which includes both land and water.
NCloth
Objective(s): To be able to understand how to use nCloth to create an array of different cloth simulations.To be able to use a wind field to affect a nCloth and create a dynamic simulation
This is a very effective part of maya at creating dynamics cloth simulations. Its a very computer extensive task which takes a lot of processing power to process the simulations.
“Mastering Maya 8.5” By John Kundert-Gibbs give some good examples of what Ncloth can be used to create on page.192. He writes” Beyond traditional cloth uses, nCloth can also simulate such diverse objects such as leaves, balloons and even water effects”. I can bare this in mind if I plan on creating any of those things in future projects.
I found this article on the Autodesk website which explains some advice when creating a nCloth:
Do not use polygon meshes with long skinny triangles for nCloth.
Do not change the topology of nCloth objects while simulating. Changing the topology (modifications to the mesh surface that change vertices) of nCloth objects may result in collision failures.
I created two tutorials on how to use nCloth which I used to help me with my experiments. As well as looking at two of my own experiments I also looked at other peoples tutorials.
This was the first tutorial that I made:
This is the second tutorial that I made:
After having a look back at my own tutorials I decided to also look at some other tutorials to get a broader understanding of how to use nCloth.
I started with a very basic tutorial to refresh my memory on how to begin a nCloth simulation
This tutorial was good for getting to understand how I could approach using nCloth to simulate clothing on a person.
This was very similar to the clothing simulation except this tutorial went into more details about nCloth constraints.
II decided to try and create a cape like nCloth that would act like a cape on my running character. The simulation was very bad as the cap kept on stretching and acting very abnormal. I thought that this was down to the stretch properties of the nCloth but changing this did not fix the problem.
The file corrupted along with the playblast video so I do not have the simulation to show. However I have a screenshot which shows my character with the nCloth cape on his back. The character is not yellow buy appears that way because the collision thickness is visible. This means that the cape would reacts and make contact with any part of the surface which is yellow. To make the simulation look realistic its important to make sure that the nCloth does not go through the body.
This was another test with my the same running man from the test above. Rather than have a cape on him I made him run into a hanging nCloth. I wanted to see how the cloth deforms and wraps around him as he runs into it.I had to ensure that there was a high poly count in the nCloth node so that it could calculate a more precise simulation.
I had to make sure that the nCloth was not to stretchy as it would have just stretched and not have deformed as I wanted it to. The nCloth needed to have some weight so that when the man makes contact with the cloth the weight of it will push against his body and make his outlines visible.
This is a playblast of the test:
After learning about nCloth and volumetric lighting I got the idea to try and create a scene with volumetric lighting shining through a window as well as curtains blowing. The curtains would move around in the wind and move the light-fog around. This would be create a really dynamic scene.
The result was a real technical accomplishment as the volumetric lighting and nCloth dynamics worked together very well. The scene shows the nCloth moving about due to wind. I added wind to the nCloth so that it would move around in a specific axis. I ensured that it blew in the axis which, made it look as if wind was coming through the window.
This was the final output:
When creating this scene it would have been very difficult to see how the renders would look without caching the simulation. When this is done the whole simulation is computed so that I am able to scrub through the timeline and see the simulation in real-time.
This was the wind which I added to the nCloth to make it blow around. In the wind direction section you can see that in the third box along that there is a value of 5. This value of 5 creates wind in the z axis which made the wind look like it was coming in through the window.
Critical review
Using nCloth is a very challenging thing to understand in Maya due to all of the complications entailed with nCloth simulations. NCloth is both a very frustrating yet very rewarding dynamic to work with.There is a lot of frustration trying to get the nCloth simulation to occur but when it does there is a a great result.
I was able to create curtains which were affected by a wind field which was my objective. I managed to have the curtains blowing around in the wind which was my intended outline. However the simulation was not as realistic as I would of hoped. This can be improved with more experimental work and gaining a better understanding of gravity.
I think that all of my simulations were let down due to the effects of gravity. the gravity was not sufficient enough to make my Ncloth objects fall as they would in the real world. Overall i would still class my experiments a s a huge success as they deformed and acted as they would in the real world.
Looking at industry standard cloth simulation I can see that mine was not up to the same level just yet but with some small improvements I will be at the correct level.
Physics
Objective: To develop a superior understanding of how gravity works. Once the correct level of gravity knowledge has been achieved, create physics based simulations using gravity
This is one of the biggest fundamentals to creating a realistic environment. The world we live in is bound by physics but the physics I will be looking at is gravity. Every human on earth experiences gravity on a day to day basis so understands how it works. They may not know the reason why there is gravity but they know that if they hold something and let go of it, then it will fall to the ground.
This is a scientific explanation of what gravity is and how it works:
The key idea of Einstein’s theory of general relativity is that gravity is not an ordinary force, but rather a property of space-time geometry. The following simplified analogy, which substitutes a two-dimensional surface for four-dimensional space-time, serves to illustrate this idea.
Imagine empty space – in our case, a two-dimensional plane – with no forces acting between the bodies floating around. If there are no forces, then classical mechanics and Einstein’s mechanics of special relativity are in agreement: Under these circumstances, bodies move along the straightest possible lines (which in this case are just straight lines in space) with a constant velocity. In the following image, this is symbolized by the straight paths of two particles A and B:
In particular, particles that start to move along parallel trajectories (as in the above image) will never meet, but are fated to remain forever at a constant distance from one another.
In the world of classical physics, if particles diverge from this behavior, it must be because there is a force acting on them. Forces accelerate particles, causing them to leave the straightest possible paths and follow curved trajectories instead. In our two-dimensional example, look at the following picture,
in which the particles A and B start out in parallel, but are then accelerated towards one another. In Newton’s theory of gravity, gravitation is a force which could cause such an effect. For instance, the reason that the two particles in the above picture accelerate toward each other and then meet could be that they are both attracted gravitationally by a massive body located at the point of their meeting.
However, there is another possibility in which the same situation (where two particles that start out in parallel converge and finally meet) could arise. The two particles could still be moving on the straightest possible lines – not in the plane, but on a curved surface! The following image shows an example:
In that situation, there is no force making the particles deviate from the straightest possible lines; the mere fact that the particles are moving on a sphere means that, even if they still move as straight as possible, their paths will converge.
Einstein’s theory is exactly analogous to this. In Newton’s theory, gravity makes particles leave their straight paths. In Einstein’s theory of general relativity, gravity is a distortion of space-time. Particles still follow the straightest possible paths in that space-time. But because space-time is now distorted, even on those straightest paths, particles accelerate as if they were under the influence of what Newton called the gravitational force.
This tutorial was created by a technician from Autodesk and showed how to create a physics based simulation using the Bullet plugin. He explained how using surface collision is better than using box collision is the best way to create a much better simulation.
This tutorial was very good at showing how velocity and mass can make a simulation very different.
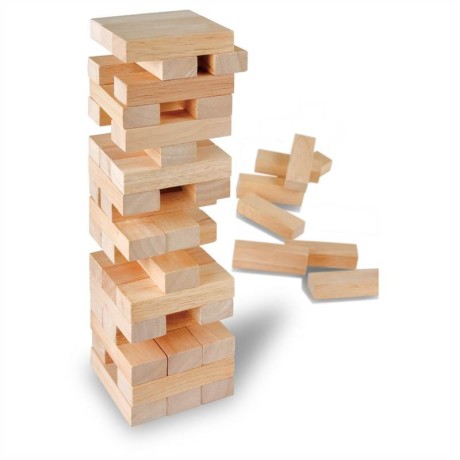
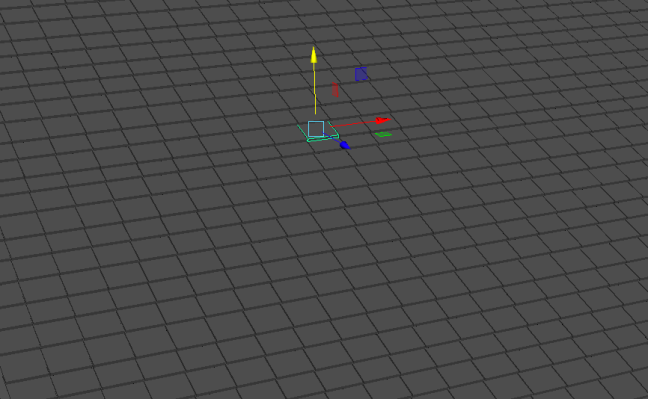
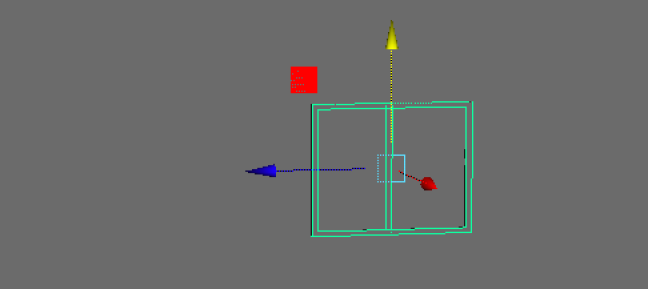
With a very complex scientific understanding of what gravity is and how it works I then decided to create physics in Maya. I started my experimentation by creating multiple rectangles. I stacked them the same way that the blocks in the Jenga game are.
Jenga game
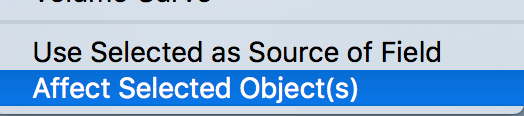
After I stacked up all of the rectangles I had to then apply gravity to them. If no gravity is applied to them then would just be static objects. To gravity I went to the field menu then selected gravity. Doing this creates a gravity field but unless you apply the gravity to the objects they will remain unaffected.
With the gravity field selected I then selected all of my objects in my scene that I wanted to be affect by gravity and then selected Affect Selected objects from the fields menu. This then applied gravity to all of my objects
I had to create a plane which would act as a floor to stop all of my objects just falling through space for an infinite amount of time. Once I created the plane I then made it a passive collider which makes it a active object which will stop any objects passing through it.
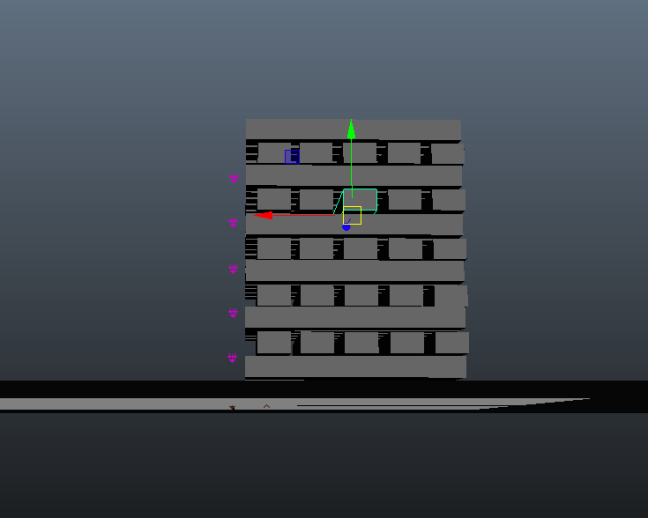
This was the final setup for my experimental test. There was so many objects to calculate that my computer could not handle the simulation so I was unable to see the results. I then decided to try a similar test with less objects.
This was the result from my second experiment which involved less objects which made the processing a lot less intensive. This made the simulation possible for my computer to process.
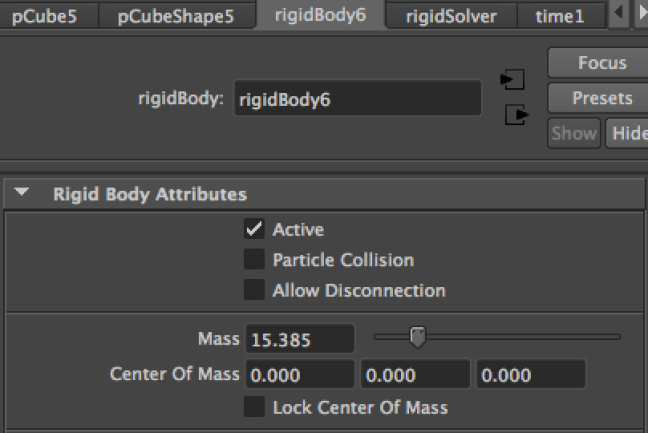
I increased the mass of the objects to see how diffrent mass would affect each simulation. Having a greater mass would in theory make the objects drop quicker. The mass ended up being so great that the structure held its ground and did not tumble over. I used a keyframes passive collider to hit the legs supporting the structure to make the structure lose stability and fall over,
I then wanted to experiment with a rolling ball which would hit into some objects. I wanted the entire simulation to be gravity driven with ni kind of keyframing.
I wanted to create a scene similar to a bowling ally with a bowling ball which hits bowling pins. To make the bowling ball move without keyframing it, I had to create a ramp which, the bowling ball would roll down and build up velocity.It would need to build up enough velocity to be able to both reach and knock down the balling pins.
I had a look at this reference for a balling ally which was also created in 3D:
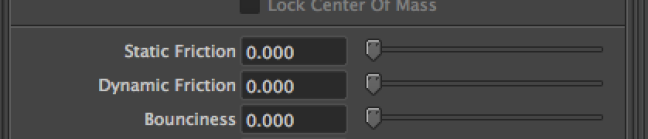
I needed to ensure that the surface that the bowling ball would be rolling along had no dynamic or static friction as this would have caused the ball to not roll fast. I also had to ensure that the surfaces were not at all bouncy as this would have created an unrealistic simulation.
This was the result from the test hat I conducted:
The balling pins reacted in a way which was not realistic at all. They appeared to float around after they had been hit by the bowling ball. I am not sure why this had happened but think it may be due to their mass value not being sufficient.
Two books which were very informative in helping me understand physics in maya were:
Maya Studio Projects: Dynamics
By Todd Palamar
Maya Professional Tips and Techniques
By Lee Lanie
Critical review
A huge part of this experiment was getting to understand gravity and how it works. It seemed like a simple task of just making something fall to the ground but it was a question of how fast should it fall. This was something which had to be experimented with by changing the gravitational force.
I was able to create an entire simulation using only gravity. This was a huge achievement as i was able to create a moving and dynamic scene using only gravitational forces. The bowling bowl fell and rolled towards the pins and interacted with them which was a technical achievement.
This could have been made better if the pins fell to the ground quicker once they had been hit as they appeared to float around a bit. This may have been caused by an issue with the mass settings of the pins.
Experimenting with mass was a good way to see how each simulations would play out based on mas alone. Changing mass alone showed a completely different outcome in each experiment.
What I learnt about gravity will really aid me in create realistic objects which will need to be affected by gravity. I will be able to create a scene with can be completely gravity bound. This will allow me to work on game projects which require a physics based scene to be created.
I will review the feedback which I got from my exhibition and then establish what the most common answer opinions were for each question. This will allow me to the generate an overall opinion on each area and then I can develop my work based on these opinions and use them as guides.
As most of my feedback is from other artists their opinions will be greatly valued and I will use them constructively. Most feedback can be found on my here on the video in the comments section:
\\This is a video which contains a showreel of some experiments which I have conducted. I have undertook these experiments to provide me with the creative rationale and skills to help me in my Final Major Project.
Any feedback left would be greatly appreciated. Take into account that these are not final pieces and just for experimental purposes. So critique and suggestion on how I could do things differently or better would be amazing. Please use the following template, as this would be hugely beneficial to me:
1.)What do you think of my rain simulations? and was the after effects one or the Maya one better
The most common answer for this question was the after effects one. Although this was the most common answer many people still mentioned that there was only minor differences between the two.
Review
Most people said that there was barely any differences so this means that I will now go with what ever is most efficient for me to do in future work. The Maya one takes a lot more time as more work is involved plus there is also the wait for render time.
I will now opt for using After Effects in my future work but ensure that I improve the overall quality of the final output.
2.) Do you think adding rain into a scene, helps create a more realistic environment?
Most answered that it creates a more realistic scene as its highly similar to the real world. This suggested that having aspects of the real world in my work would mean that it would appear more realistic as people will be able to relate with and understand what they are seeing.
Review
The obvious has been made clear by this answer and that is having real world aspects in my work leads to a more realistic final look. This has to be done right as trying to make a scene look real but doing it poorly could ruin future work. So knowing that people like to see the weather system play a role in games/animations means that I am able to continue my learning curve in creating weather.
3.) Do you think my dynamic domino effect was realistic or unrealistic? and why?.
Too slow was the most common answer which is a simple fix yet can ruin the whole final product. This issue was down to a size and scale issue which meant that that the wrong calculations were being processed when the dynamic collisions took place.
Review
Getting the most simple thing wrong can ruin and entire product so its crucial that I do not take any shortcuts in future projects. What I should have done was look at more references of dominos so that I would of been able to see that my work looked a bit too slow.
I will now ensure that I will always take into account size and scale when using dynamic collisions.
4.)Was my cloth simulation more organic and realistic with or without the wind effect?
Most people said the wind one although I knew that this would be the answer already. Having a boring old lifeless flag would not be visually interesting for anyone but nether-less I wanted to be sure that people did not think wind was over doing it leading to unrealism.
Review
I think that I should have included more types of flags in the wind by changing the wind intensity to create different simulations. This would have allowed me to see what type of windy flags people thought looked more realistic.
The windy flag could have done with a more realistic render setting such as on a building or something to portray realism better.
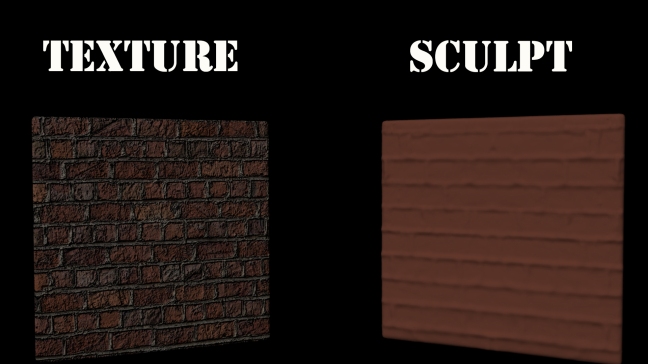
5.)The textured wall in maya has a much lower polycount than the sculpted wall. Even with the final sculpted wall looking better, do you think its worth creating a larger filed game with the, chance of lag for for a slight graphical improvement?.
This was a very close call with it being quite even on what peoples opinion was. The final amount of people did however state that they would rather see a game with better graphics over lag. This would mean that I need to focus on creating assets that or more visually impressive than low poly assets which will lack as much detail.
Review
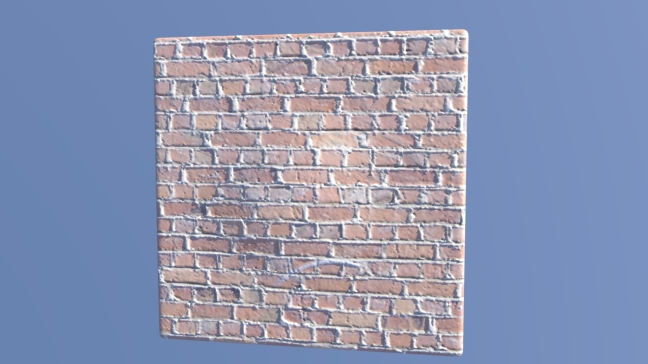
I think that I should of had my final sculpted wall with projection along side the Maya modelled wall to of created an equal compassion. In my video I had the sculpted model with no texture which may have hindered the results. This does not make it a failure as my overall objective of this question was still met.
I was able to allow me to see that whilst many people prefer graphics the same amount of people would rather a game with lower graphics that was more playable. So this means that I should aim to meet both demands and create something which is visually impressive as well as very light on the graphics processing unit.
6.) Do you think that my sculpted lady bares any resemblance to her photo image? What do you think was missing to make it look more like her?.
Nearly everyone said that she needs hair and other features added to her to make it look more like her. Although this was said most people said it does look like a good sculpt and that its a great start.
Review
I was able to learn that before I ask questions about whats missing I should have stated the obvious about what was missing. What I mean by this is that I knew that hair was an important part to making it look like the photo so people suggesting thats what I do was just stating the obvious as I already knew that. By mentioning what was purposely missing would have meant that I would have got different answers.
7.)Do you think that the wall looked like that it would work well in a games environment, based on my test using a games engine?.
Most people were happy with seeing the sculpted wall in a game even though it lacked textures. This is a great answer as it means that it would only be more accepted if it did have textures as it would fit into a scene even better.
Review
Although I missed out on adding a texture to the wall the audience were mostly happy with the way looked in the games engine. This would meant that I could have impressed them even more by adding a texture.
I will ensure that my wall is textured when I have it in my scene in my future work to give it that much more graphically sophisticated level of achievement.
Final Review
After reviewing my answers for each question independently it has allowed me to evaluate how my entire screening went as a whole. I feel very satisfied with the feedback that I was given as it was both informative and trustworthy.
The feedback has allowed me to foresee how I will now approach future projects and understand the audiences demands. Its showed me that its easy to get carried away with what I think is right and now I am able to see that getting feedback is a great way to open my eyes to what most people think is right.
My objective of this screening was to get a general idea of what people found visually pleasing and would like to see in real products. I wanted to get opinions on how things look better and why they think makes them look better. This was so that I would be able to get a general understanding of how to create a visually impressive project in the future that will appeal to the general audience.
After watching how my fellow class mates exhibit their work I decided to take a different approach to showing my work. My class mates went down the route of showing each other their work and getting feedback from them. I felt somewhat watched as I gave feedback which may have hindered my feedback which I was giving.
This does by no means I felt pressured but i did feel that many of the other people in my class who were giving feedback to each other were subconsciously giving results which were more nice and not very critical. This is not a fact but my personal opinion on the results in which I witnessed.
The internet is a cruel place where you meet many mean people who love to throw out rude comments and say what they like. The internet allows people to be invisible but still get their opinions across. So this meant that if i was to use the internet as a gateway to displaying my work I could then get real opinions from total strangers.
I have built up a youtube channel which has 320 subscribers with most of them being 3D artists. This means that using my youtube channel would a great way to get feedback from experienced people who do not personally know me. I felt that this was a good way to get around the biased feedback but also get feedback from more experienced people.
I will be screening my experimental approaches so that I am able to gain some feedback from . This screening could lead to very constructive criticism which I can then use to my advantage to improve on the way in which I create my FMP(final major project).
What will I be showing
I will be creating a short showreel of some of the work I have been experimenting with. I will stitch together all of my experiments into one video which I will the showcase on a projected screen.
3D Work
I will be working extensively in both Autodesk Maya and Mudbox so the majority of my work will be created in a 3D package. This will mean that the majority of my experimental approaches will be made using 3D software.
I will be rendering out my finished Mudbox work using Maya, as it provides a much better rendering engine. I will use animated camera to show my experiments from various angles as this will give a better insight into what I have been experimenting with.
After Effects work
This will be a relatively minor part of my experimental approaches but its something which I will want to show. I will have a brief example of live video with an overlay which will show the kind of effect I am trying to achieve. This will be great to get feedback on this and then understand maybe what I should and should not change.
How I exhibit my experimental approaches showreel
I have my own Youtube channel which has over 300 subscribers with most of them being 3D artists. So by putting a video of my experimental approaches i will be able to get great feedback from many experienced artists.
I am also able to promote the video very easily via WhatsApp messenger, Facebook and email due to the easy access which YouTube provides. I was initially going to screen it to my class mates but after
Questions
I have thought about what questions I want answered that would not take too long for the viewer to answer but still provide me with very constructive criticism. I looked at work that I had created for my experimental approaches and then I created questions which would answer my concerns about my work and then allow me to then make the right choices on my future projects.
Understanding what questions to ask was key as there was no point in asking random questions or get feedback for something which would not allow me to see a path to construct future work.
Here is what I will ask my viewers:
\\This is a video which contains a showreel of some experiments which I have conducted. I have undertook these experiments to provide me with the creative rationale and skills to help me in my Final Major Project.
Any feedback left would be greatly appreciated. Take into account that these are not final pieces and just for experimental purposes. So critique and suggestion on how I could do things differently or better would be amazing. Please use the following template, as this would be hugely beneficial to me:
1.)What do you think of my rain simulations? and was the after effects one or the Maya one better?
2.) Do you think adding rain into a scene, helps create a more realistic environment?
3.) Do you think my dynamic domino effect was realistic or unrealistic? and why?.
4.)Was my cloth simulation more organic and realistic with or without the wind effect?
5.)The textured wall in maya has a much lower polycount than the sculpted wall. Even with the final sculpted wall looking better, do you think its worth creating a larger filed game with the, chance of lag for for a slight graphical improvement?.
6.) Do you think that my sculpted lady bares any resemblance to her photo image? What do you think was missing to make it look more like her?.
7.)Do you think that the wall looked like that it would work well in a games environment, based on my test using a games engine?.
Objective: To learn how to fly a drone and then capture footage of a building.
Using a drone to capture aerial footage is a great technique to capture the best possible reference without having to use a plane or helicopter. Using a drone can provide you with reference which would have to of been a figment of the imagination otherwise.
So I decided to began by watching many online lessons which show me how to fly my model of drone and all the essential things that I need to know. Here is a few of the tutorials I watched to help me with getting a better understanding of the functions of the drone:
In this video all the basic of the drone are explained such as what is in the box and what they are for. It was vital that I got an understanding of all the components of the drone to ensure that I was able to fly it without any severe accidents or having the drone fall apart in mid air.
In this video it explains all of the basic functions of the drone such as the various flight modes which will be important for me to understand to allow me to capture the best possible shots. There is a ariel photography mode which is perfect for what I intend to do.
After I got an understanding of how the drone works and how the components all work in relativity. I then decided to take the drone out for a test flight. I took the drone to an open area in my local park to lower the chance of me crashing it. I was quickly able to see how fast it gains altitude, how it responds to inputs and most importantly how it reacts to gusts of wind.
It was important to understand how the drone reacts to sudden gusts of wind due to me eventually flying it in a much more built up area to capture my required footage. Not understanding how the drone would react could be very disastrous if it was to catch me of guard and lead to the drone possible breaking, causes property damage or even worse a person damage.
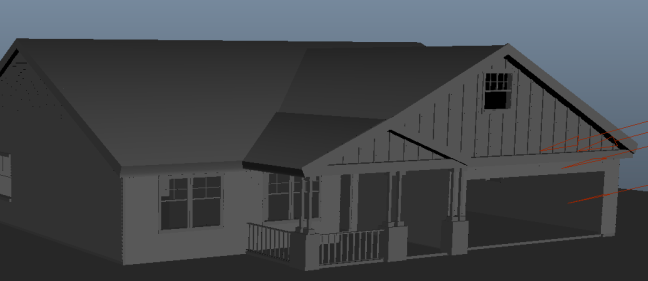
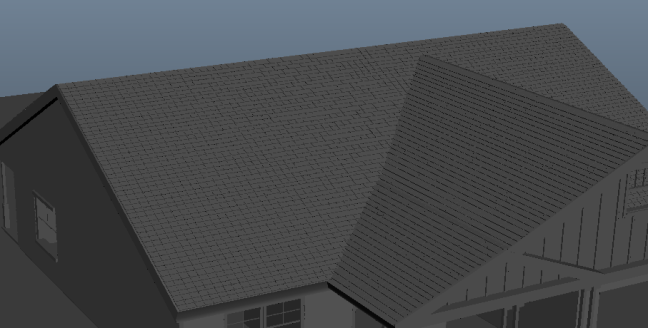
Once I had some experience piloting the drone I then decided to then take the chance of getting up close to my building and film the roof which is not possible to get to by foot. I needed to get as close as possible to the building to capture as much detail as possible.
Critical Review
I was able to learn everything there to know about the drone to allow me to fly a drone successfully. There was a lot of functions to learn about the drone which was a very tedious task to undertake as there was so much to learn. I had to watch many video explaining what functions do what to ensure that I understood everything there was to know about the drone before I piloted it.
I was able to pilot the drone in very close proximity to a building which I decided to use and example to film. I was able to get some close up footage of the room which would provide clear and accurate reference to work with. Understanding how to get close to the building without smashing the drone into the side of it was a matter of understanding the functions.
The function called ‘SAFE’ mode was the best function to use as it did not fly too fast and always used GPS to hold its position. Using another function would of disabled GPS which would of meant that the drone could of got carried away with wind and probably crashed.
I managed to meet my objective which enabled me to have a successful flight and capture good reference video. This is a technique which I could now use in future projects to capture ariel footage of an area which could then be used as reference. Using this method would enable to me to have accurate reference which would then enable me to create work which is more accurate and therefore realistic.
Although I will not be using After Effects a lot in my FMP it will still play a very important part in me achieving my desired look and feel to my FMP.
I will be using Adobe After effects for the simple task of creating a video camera recording effect. This is due to the fact that my animation will be completely from the perspective of a video camera. By using this type of effect it will make it evident that its all recorded on a video camera.
Its quite a simple process to get the desired effect as it will just be the case of overlaying the video effect over my renders in After Effects. I will be doing all the camera movements in Autodesk Maya so its essential that I get the camera shakes and angles as accurate as possible to save it needing to be done in After Effects.
In this video I simply created a video which appears to be recorded on a video camera due to the overlay effects. I have also included a video to show how I created the simple composition and I will also Give a step by step guide on how I achieved it.
Step 1.) Import my original footage first so that it sets the timeline to the length of my original footage.
Step 2.) Import my recording video camera effect.
Step 3.) Drag the original footage onto the timeline first so that the time scale is set to that footage.
Step 4.) Then drag the recording video camera effect and ensured that it is place it over the original footage.
Step 5.) Select the recording video camera effect.
Step 6.) Use the Effect Drop down menu, then from the drop down menu select keying then finally select Keylight ( 1.2).
Step 7.) Use the colour picker tool which is linked to Screen Colour and select the green on the recording video camera effect footage to make all the green become transparent.
Here is the video footage of me creating the composition:
Here is a video of my final result:
The video effect is very basic but its all I require to get my desired effect.
Looking at many films I am getting and understanding of what it is that needs to be achieved to create a realistic looking hand held camera effect. The main thing I noticed from the film Cloverfield which is recorded entirely on a handheld camera is that the footage is not the clearest. What I mean by this is that there is a slight distortion/blur which has been added to the video effect to bring down the overall clarity of the footage.
This is a great technique to portray a film which has been captured on a cheap and flimsy handheld camera. The resolution and overall picture quality would not make much sense if it was filmed at a near perfect resolution with perfect clarity. This would create video footage which would be too good for a handheld camera and the audience would not believe it therefor failing to be visually impressed.
Here is a trailer from the film Cloverfield which shows how the film was created using a handheld camera effect:
I will also be using Adobe after effects to create set extensions to save me time in modelling. Rather than modelling every single building in sight I will be using set extensions to create buildings in the distance. As well as making my overall animation look amazing and well built it will also save massive render times and scene file size. Having a huge amount of actual 3D model buildings in shot would create massive render times which would mean a lot of time wasted doing unnecessary rendering.
In this video here i just experiment with adding set extensions to some live footage I captured. Although there was no real target I just wanted to experiment with creating a new scene using extensions.
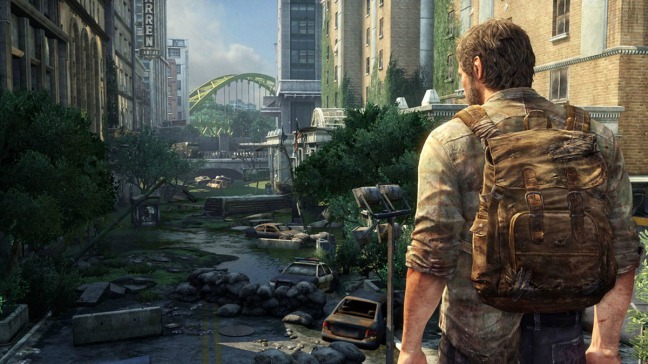
This is a screenshot from the game The Last of us which is a hugely successful game. This game managed to captures peoples attention though its immersive gameplay. This was achieved using great story telling and great visual techniques. The game had very good graphics but a huge success in the game was the architecture. You can see from this screenshot how well the building adds depth, life and realism to the scene. This is why I decided to look at this game for inspiration to understanding how important buildings are to scenes.
The Last Of Us
The Sims 3 is a game which evolves around a character which the player controls. This character lives in a home which it can customise and change as they please. This game is partly successful to this part of the gameplay. If there was no building to customise then there would be no motive for the player to earn money as the money is normally spent on the house. this was another game which shows the importance of a building in a game.
The Sims 3
Objective: To use a blueprint as reference to construct an entire house.
I will be experimenting mainly working on the architectural side of things and using my knowledge in Maya to aid me in creating accurate models. I will be modelling many different types of building in future projects so gaining an in-depth understanding oh how buildings are built up will be a great skill
I thought that I good way to understand buildings was to look at the blueprints for a building and then attempt to build it using the blue print as a reference. It was quite simple to build out the layout but the hard part was working out how high the building should be. I then decided to go on what looked right and then went with that. I started of with the height of the door which I made 6 foot tall and then worked up from that.
I knew that the house had to be able to allow at least a 6foot person to be able to walk around comfortably. So i then added an extra 3foot on that making the ceiling height of the house 9foot tall which would be a decent and realistic living space.
Blueprint for a house
These images are also concept for what the side of the house should look like. I will use this along side the blueprints to complete the house.
I started out my model by creating polygonal cubes which I made the same length as the blueprints. I ensured that they were all the right size and matched up with the blueprint.
I then used the side reference image to drag the centre vertices of the appropriate wall and made sure that the edges matched up with the reference image. To ensure that the edges matched up I had to make sure that the vertex of the wall which I moved upwards met with the corner of of the reference image. If this was not done then there would have been done then there would have been issues with the roof as it would not match up to the wall.
I then modelled the outside patio area again using polygonal cubes to shape out the details. Placing these added enough detail to start showing a house in development. The beams will make great shadow casting objects which will be created by blocking out the sun light.
I also created a beam out the back which joined up with the roof support.
I then added in window frames which were created again using polygonal planes. I had to think about the measurements and ensure that each piece of the window was accurate so that it fir into the window space. I used a glass material to simulate a real window so that when rendered there is not just a empty space between the window frame.
I then add the roof which was a very tricky procedure to do as there was lots of of penetrations between the different roof parts. I had to use the vertex tool to remove as much of the overlapping as possible so that the model is overall more of s sophisticated construction.
Once I had created the ceiling i then placed tiles on the roof to add detail and make the building look more realistic and sophisticated. This was not a easy task as there was over 300 tiles which had to be individually placed which took a long time.
This was my final render.
Critical Review
Using a blueprint as the only reference is a real challenge as there is no idea of texture or colour. This was the reason why I decided to not use any colours or textures as this would of made my building the fictional as it would not be based entirely on the reference. I wanted my entire model to be built entirely based on the blueprint with no more and no less added.
The model itself is a very well built and professional looking model considering only a blueprint was used as reference. The contains a very high poly-count which would be suitable for animation movies but would not be suitable for games. I decided not to consider poly-count when modelling this as my main focus was to just build a building based on the blueprints.
This experiment taught me how to understand measurements in Maya and ensure that I abide by them to have an accurate end result. If I was to of ignored measurements then the end result would not have been very disproportionate.
Objective: To use a reference image to model a building
I decided that I would now model another building but instead of using blueprints, use an actual image. I used google maps and found a random flat and the screen shot the image. I decide to go with this flat because there was added charter to it by its surroundings. There was a tree which was right next to it which, added life to the area. The flat itself looked very run down but the tree added life to it.
I have got a fairly good understanding of how to model in Maya but the difficult task here will be to try recreate this image which will be difficult due to the angle. As the image is taken at a slight angle I will need to guess the actual size of certain aspects and try make it match the camera. To do this I will set up a camera which I will then use as the main camera to match the image.
I started of by box modelling the building as the was the biggest component to the image. Doing this first will then allow me to use it as a measuring tool to understanding how big or small everything else should. So I know that based on my reference image that the building is roughly 3 times taller than the tree. Knowing the right proportions will allow me to match the reference image much better.
I then created the right amount of edges so that I could use the face extrude tool to extrude the faces which would then become the balconys.
To make the shape of the roof I grabbed the vertex on the side of the building and dragged it upwards to create a triangle type shape which would be the base for the roof.
I then created the railings which run alongside the building using polygonal cubes and cylinders. Cylinders have a high poly-count by default so I had to make sure that I brought this count down by as much as possible. These railing will not be seen up close so there was no point in having unnecessary detail if it will not be seen. Its industry practice to use low detail on areas like this which will go unnoticed.
I then created the window frames using polygonal cubes. I had to make sure that the centre cube was exactly in the middle so that each side of the window was equal.
I then created the street light using a cylinder and some cubes. I did not add any lighting elements to it as my reference image is during the day so there would be no reference in knowing how the light looks.
c
I then added the wall which is behind the railings which connects onto the building.
I used paint effects to create a tree which best looked like the tree in the reference image. i converted the paint effects to polygons once I was happy with the shape and size of my tree. This element added a lot of character to a a scene which is made up of mainly cubes.
This is the final result along side the reference image that I used.
Critical review
My final result does bare a resemblance to the the reference image which was the objective so I would therefore class it a success. It was a real challenge trying to model from a reference image which was at an angle. This added distortion and confusion when trying to understand how big or small an object had to be. I was able to use my initiative and use each object in the reference image as measuring tools to understand how I should make things.
The final result is by no means a realistic model due to there being a lot of elements missing from it. There was no textures or materials of any sort added to the model. This was because I wanted to just model this for experimental purposes and not worry about focusing on materials and textures. With textures and the right materials applied this model will look a lot better.
Sculpting is a art form which is done using the software Auotdesk Mudbox. Sculpting is the same as clay sculpting except using a computer to create details. There is a wide rage of tools in Mudbox which will need to be understood If I am to be able to use Mudbox effectively. There is many online tutorials which can help me to understand how to use Mudbox.
I will start of my experiments by trying to create a wall in Mudbox using what techniques are unique to this software. I will be approaching this as a complete novice with no prior experience using sculpting software so its important that I take it slow and lean as much as I can.
Brick Wall
Obejctive: To be able to use Mudbox to create a wall and then compare it to a wall modelled in Maya
As I will be having a huge amount of buildings, I thought that I should understand how to sculpt walls in Mudbox. Its not essential to know how to do this as making a wall can be achieved very simply in Maya.
In Maya creating a wall can be achieved using a texture along side some bump mapping to create that 3D look. Mudbox will entail I a whole different which involve sculpting in the brick details. I have watched many videos online about sculpting walls in Mudbox although nobody has done a brick wall in Mudbox. I think this is down to the fact that a brick wall is relatively flat and would be a waste of time using sculpting methods to create one.
I watched this video from a teacher, who teaches the art of sculpting using Mudbox.
In the video you are shown how to create a very old style, stone wall. Although this stone wall is not brick based it does still start from a cube foundation, which would be the same base for a brick wall. I was able to follow his procedure and work out how to instead of create stones, create bricks.
Modelling a stone wall in Maya would be a tedious task, so using Mudbox is the better option in this case.
This is an image from the game Grand Theft Auto: V which shows a brick wall to the right of the image. You can see that the wall is clearly constructed from bricks based on the texture that has been applied to it. Its highly unlikely that the wall was sculpted as this would mean that the wall would of had to have a high poly-count. This would not be industry practice to waste so much disc space on a simple wall which could be created using a texture instead of sculpted geometry.
To start of my sculpt I first created a cube using the object creation tool which allows you to create some basic shapes. Once I had created the cube I then had to make it the appropriate size which would resemble a wall.
Once I had a wall shape in place I used a a stencil and positioned it in place over my wall and with the stencil in place then began sculpting out the brick texture. This was achieved using the wax tool which uses the brightness values of the stencil as a reference to adding depth.
Once I had sculpted my wall I then imported it into Maya where I had previously modelled a wall for demonstration purposes.
Here is an image containing a textured model in Maya and a sculpted model in Mudbox:
I then decided to learn about projection painting within Mudbox which I learnt how to do using this video:
After learning how to use projection painting, I then decided to have a go at sculpting a wall again. This time I also used projection painting alongside my sculpt to create a very realistic looking wall.
Critical review
Although a wall is a very basic shape in terms of geometry, it is a very crucial part to having realistic looking buildings.
I had to understand what approach would give me the best possible results with the upmost efficiency. The second attempt at sculpting a wall provided very professional results which would perfectly situated within a games environment.
So visually the sculpted wall would work just fine but the poly-count is so much higher than
Human sculpt
Understanding how to sculpt the entire human body from head to toe was, a challenging yet vital process which I had to understand. I looked at many references to understand the exact anatomy of a human body. Understanding this allowed me to know where to sculpt out muscles when sculpting my human body.
The book “Digital Sculpting with Mudbox” Essential Tools and Techniques for Artists” by Mike de la Flor, Bridgette Mongeon was a great book to allow me to understand the principles of sculpting. On page 5 there is a paragraph which explains “To be a figurative sculptor, a fundamental knowledge of anatomy is required”. This suggested that understanding the human anatomy was a crucial part in being able to construct the human body effectively.
As well as understanding all of the muscles in the human body I decided to take it a step further and understand the human Skelton and also all the organs along with their functions.I found a great information on this website here about the human body :
This image was a great tool in allowing me to understand and develop my knowledge of human anatomy and transfer that to my model. As well as being able to sculpt out these muscle I was also able to know what they do and what they are called.
Once I understood everything there was to know about the human body I had to then be able to understand of to express this in my sculpting. I then watch many tutorials on how to sculpt the human body.
I watched a tutorial by a man named Justin Marshall who is a industry professional with credits such as Monster’s House and Surfs up. In the tutorial he shows how to construct the human mouth and the process it takes to build a mouth up.
The mouth is a simple part pf the human anatomy yet plays a very important role in conveying emotion. Humans look at facial expressions to understand emotion and look primarily at the mouth and eyes to get this information. I have a link here which I looked at to understanding just how us as humans understand how human emotion is expressed:
James taylor is also another great person who I looked to for great lessons in the art of sculpting. He has over 8 years industry experience in the games industry so has a great understanding of sculpting for games for games.
I watched of his on how to sculpt the human head. He explains about how there is no right or wrong way to sculpt and that its all about personal preference. I would follow his preferences for now as he has a great understanding on how to build up models.
Here is the tutorial by him that I watched:
I looked at a filmed called ‘Mars needs Moms’ as I was really impressed by how good the models were sculpted in this specific film. Although it does have that uncanny look it still is very impressive as piece of 3D work.
Without looking at animation and other aspects of characters in the film which, do not include sculpting. It was then a task of breaking down what made the models successful.
I decided to take a shot from the films which shows the main character. Instantly from looking at the image you can see these massive eyes which stand out and become centre focus. This is importnat as its the point of a face which the audience will be looking at to understand character emotion.(refer back to http://www.scienceofpeople.com/2013/09/guide-reading-microexpressions/ for more information)
The wrinkles in his forehead have been formed due to the repercussion of his eyes brows which, have risen to express a certain emotion. As well as the deformity created by the brows you can also see how the cheeks have become risen and puffed due to his mouth movement. These are realistic principles of the real way a human face would morph when expressing emotion which is what makes this character look visually pleasing.
Trailer for Mars needs Moms:
This is a model from the game Ark Survival:Evolved 2015. This is the detail of the main character so being able to at least this of detail in my sculpting experiment would enable me to match a industry standard model.
Ark Survival : Model
AS= Ark survival
In comparison to the quite unrealistic Ark survival model there is the ultra realistic UFC: 2015 Model. This model looks very well sculpted although this is not entirely true as the model looks this good due to other reason such as lighting, rendering and physics. The actual geometry of this model would be very similar to AS model but has just been rendered so much better creating a more realistic looking model. So being able to understand how to render well, is just as importnat as being able to sculpt well.
I used a 3D turn around to allow me to view every and any part of the human anatomy to give me the most precise reference when sculpting.
I started of my model by first sculpting the legs as these seemed like the most difficult part. I used the sculpt tool to create definition in accordance to muscle placement based from my reference model. The legs were quite tricky as the thighs were very chunky whilst the knee area and the ankle almost had no meat. These area were mainly made up from bone
The torso was a a very interesting yet simple area to work on as its a very distinctive part of a body. When a person is naturally athletic or a muscly person comes to mind, the most common thing associated with that, is a six pack. I however only modelled a 4 pack as a 6 pack looked quite abnormal so I decided to stick with what I had already done, rather than delete what I had done. I used bulge tools to add more size to the abdomen area so I could then cut into it using the knife tool to define the packs.
From my personal experience at the gym, the most common thing worked on is the chest. The chest adds size to the upper body which makes a man look a lot bigger. This meant that defining the chest well would make my model look a lot more masculine. Defining the chest was a matter of using the grab tool to pull out the chest then once a adequate size was established I then moved onto the wax tool, which I used to cut into the centre of the chest. This separated a single bulge into two individual bulges which I could then shape into a chest.
Biceps on a masculine man have to well defined and existent, to express the hard work the arms have endured pumping iron. To do this I had to use the bulge tool to create enough mass which could then be sculpted to represent a well defined bicep. Not having enough mass would mean that there would not be enough room to create a well build bicep. As my reference was more of a athletic person I decided not to make a bicep too big as this would have caused issues with body proportions when my model was finished,
My Human Body sculpt
After both reading up lots about human anatomy and watching many tutorials by industry professionals I decide to then spend time and experiment in creating my own model. I knew that I had to take everything I had learnt and then try apply it to my sculpt as this would lead to a successful sculpt. Abiding by industry principles would allow me to create a industry standard model.
During sculpting I continuously went back to my sources to keep reminding myself of all aspects of a human body to ensure that I was applying everything correctly.
I wanted to create a visually successful so I decided to not worry about about Poly-count for this initial experiment. Here is my final sculpted model:
I wanted to be able to show the detail of the sculpted out muscles so decided to use lighting to do this. Having a light slowly go past the human body was a great way to show the details which made up the muscles.
Critical review
I was overall very please with my final model as I think it shows how far my knowledge of human anatomy has developed. I was able to convey everything I have researched and then carried that over into the way in which I sculpted my model.
The biggest flaw in my model is the incredibly high poly-count. This drastically increased render time and also meant that the model not ideal to be ported into a game. This is a process which I will avoid when creating a model for a game.
I made sure that the body is not completely symmetrical, as the human body is not symmetrical. Although I did sculpt the body differently on both sides its quite hard to tell this in the renders. This would suggest that I needed to make more drastic differences that are more obvious. This can be achieved by something simple such as scars and other kind of deformities.
I feel that this sculpt successfully shows that human anatomy was considered and looked at prior to this sculpt which was my objective. I did not go down the uncanny route or spend far too much time adding unnecessary detail.
The final look of my model would more than be adequate to be used in games and films which would deem it an industry standard model. With this in mind it is by no means a hyper realistic or flawless model as there is lots of room for improvement but its a great first human anatomy model.
Plus size lady
Modelling a well build male model was one part of the spectrum so I then though it would be necessary to try and sculpt a female model. Not only just create a female but also make her a plus size women which would mean I would have to explore different approaches.
I first started looking at other artists who have approaches creating sculptures of plus sized women/men. I decided to not look at just women as it would narrow down what sources I could access to help me in understanding, how to sculpt a plus sized women. Fat unique to a specific sex so therefore appears the same way in both men and women.
In this tutorial you can see how a head of a overweight person is constructed. The main thing I wanted to take away from this video was how and where fat is placed to build up the face. The face is a very important part of a sculpture so understanding this was a crucial lesson.
This is a video of a lady dancing around in her living room. Although this video was created for the purpose of laughter it served me a lesson in how fat looks and moves. The lady makes some rapid movements which shows me how the fat deforms and moves around her structure.
It was quite difficult to know where to add the extra body proportions and then bulge them out to make these areas fatter. Fat is a complex part of the body and appears different in people based on genetics. Some people suffer from extreme stretch marks when they gain weight which is primarily down to genetics. Stretch marks can be very evident and change not only the colour of skin but also the texture.
I decided that in the case of this experiment that I would not be taking into account stretch marks and trying to implement them into my sculpt.
Fat can appear smooth and solid and can also appear segmented into a rice pudding like texture under the skin. I looked at many images of fat and how it appears in the human body. Understanding how fat can vary from person to person gives me a general into the formation of fat.
Critical review
I was not satisfied with this model and feel that it needs a lot more improvement although it was still a learning curve. Although the final output of this model was not the best it allowed me to learn new skills in creating bulges and morphing geometry to look fattier.
I set out in creating a plus sized lady which is not as strongly evident as desired. This is mainly due to the fact that I did not sculpt prominent breast tissue. Looking at many references of plus sized women they all have prominent breasts which are more often than not largely sized. By me not including this in my sculpt it makes it a lot harder for people to see my model as a plus sized women.
I was able to bring the overall poly-count down to less than half of what my male sculpt was. This meant that I found it harder to add fine details but it was not that crucial to this model therefore no compromise was made.
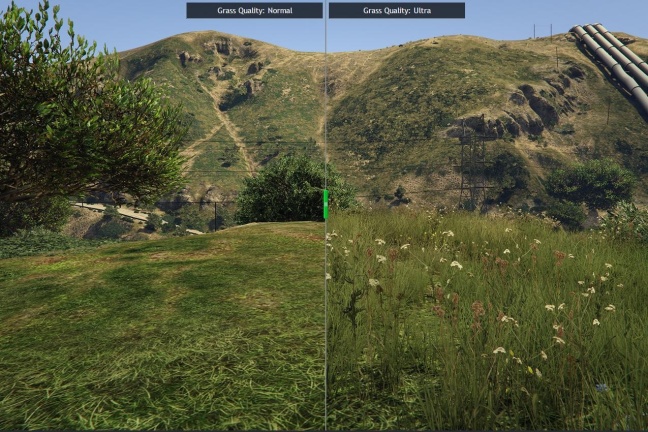
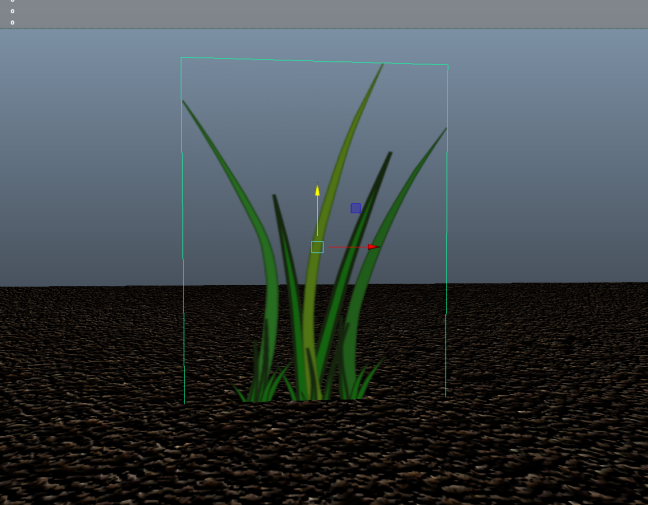
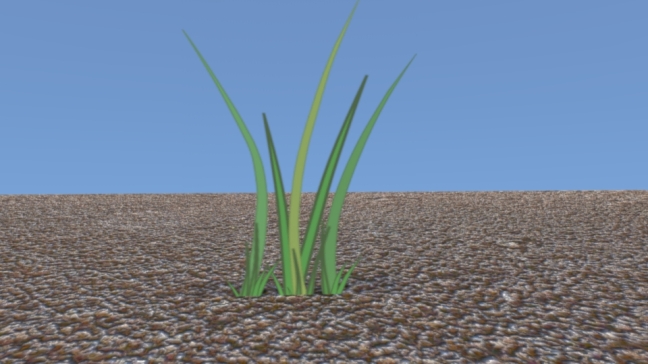
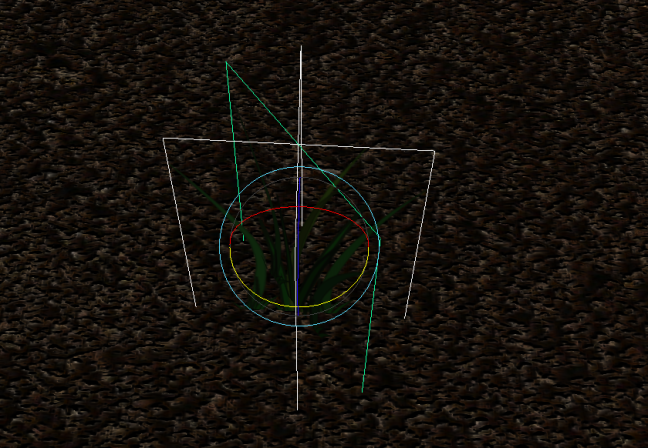
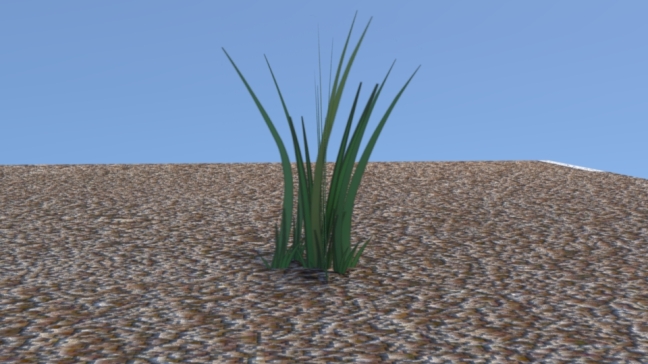
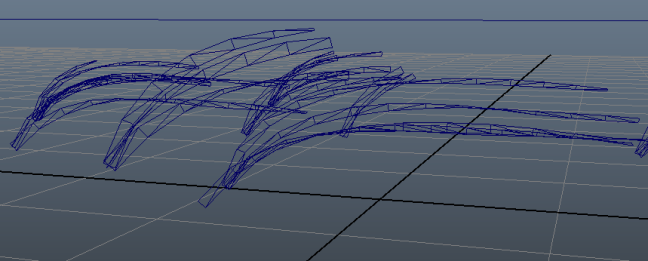
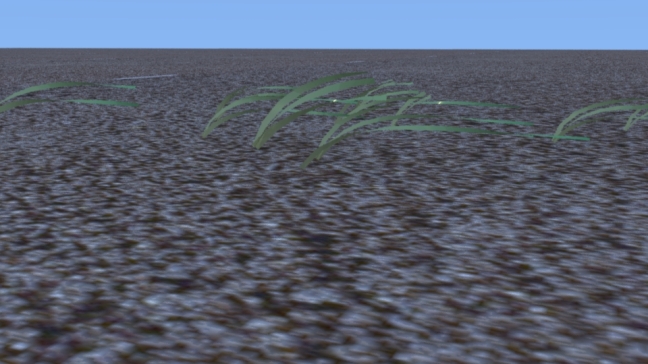
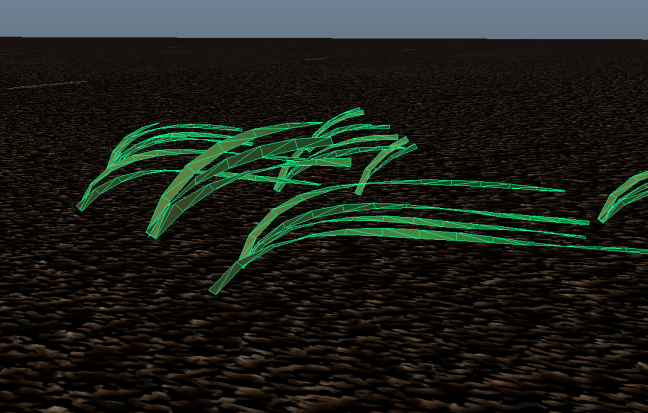
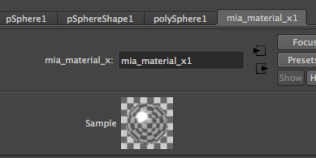

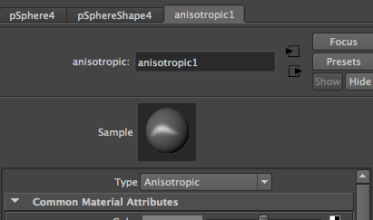
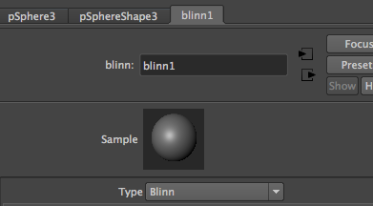
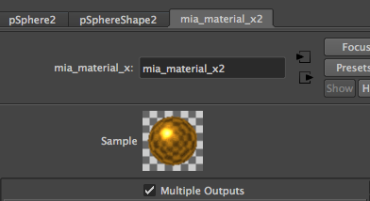


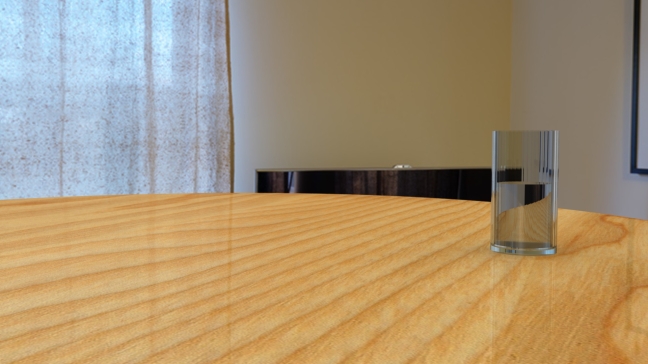
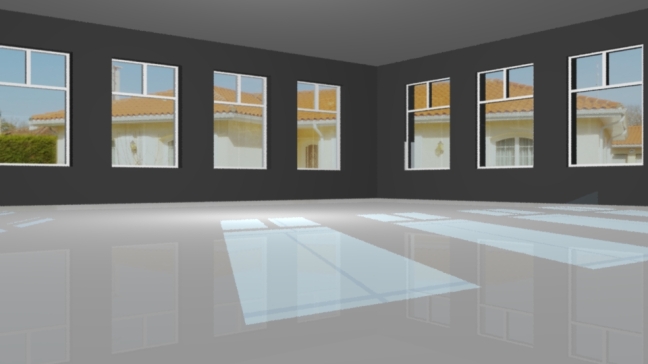
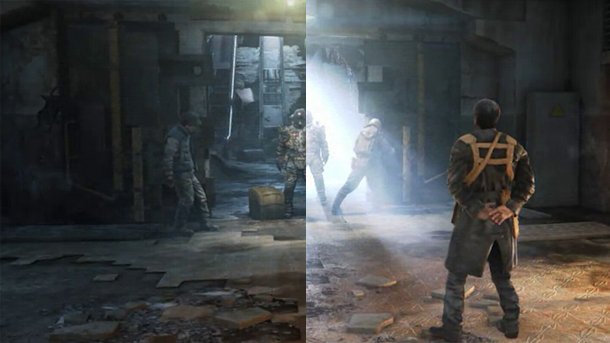
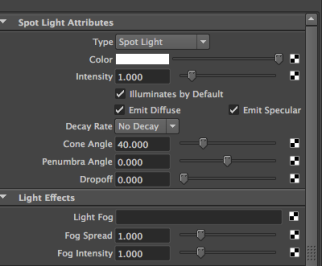
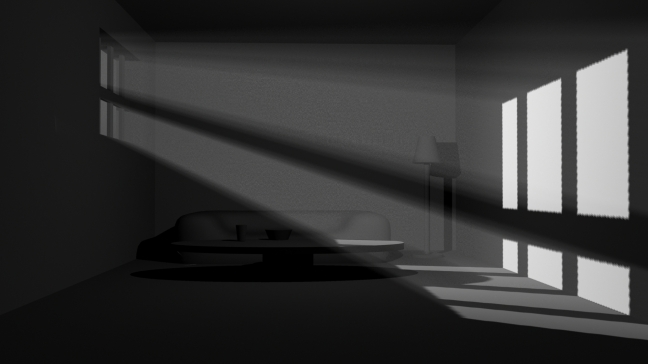
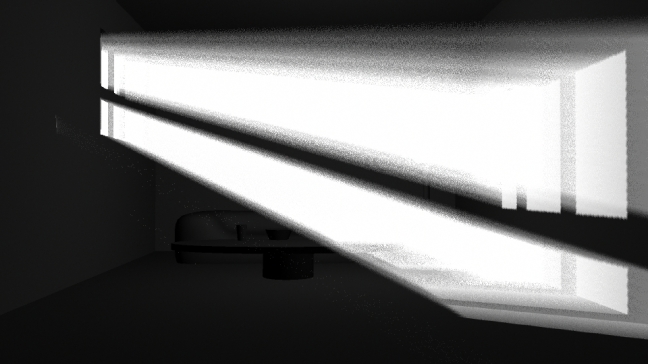
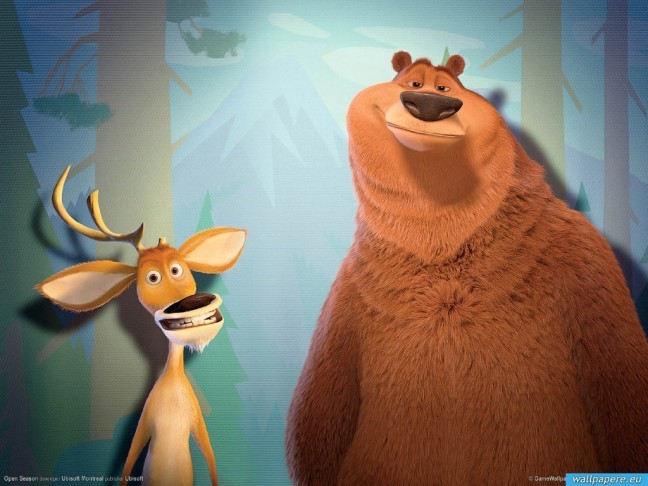
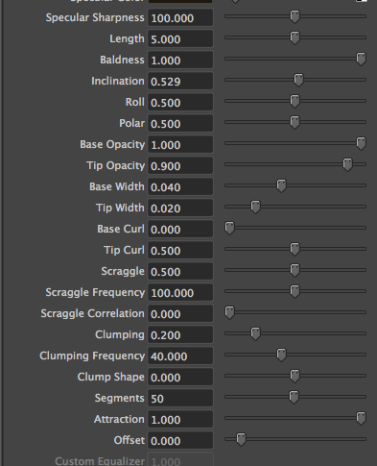
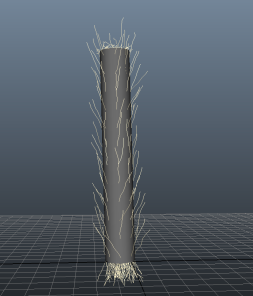
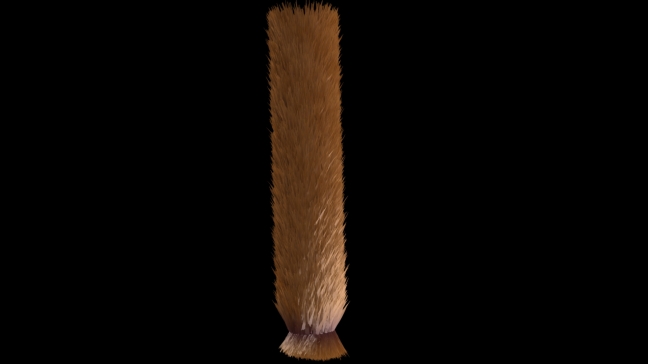
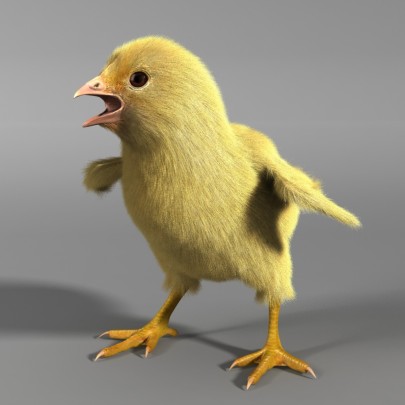
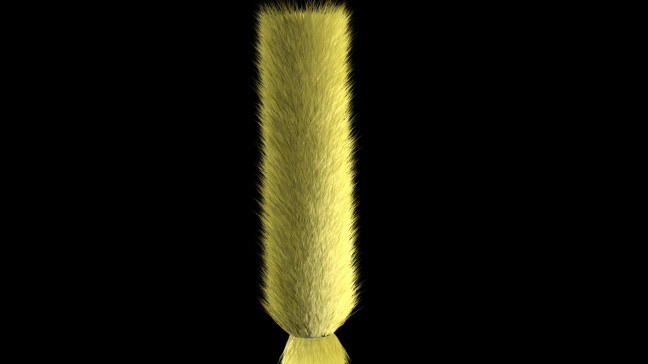
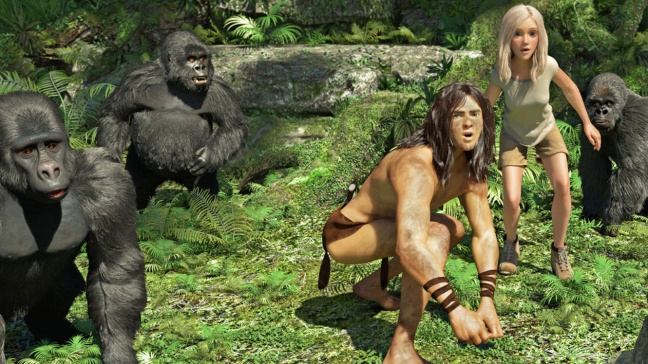
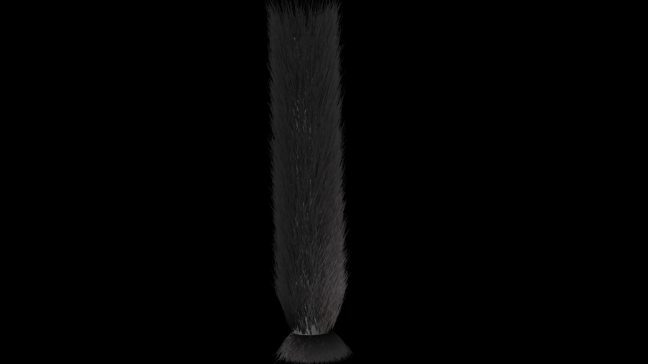
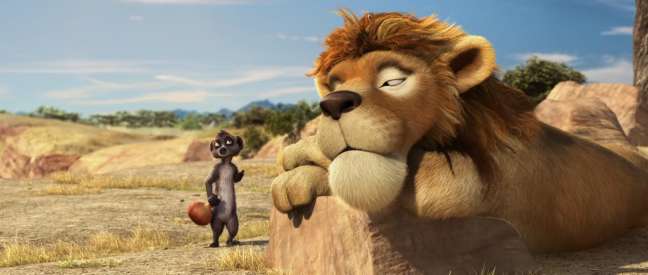
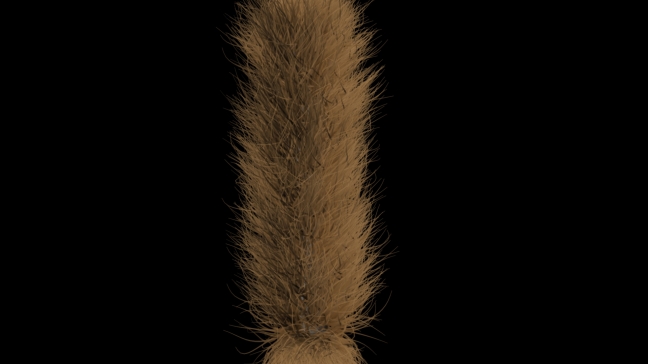

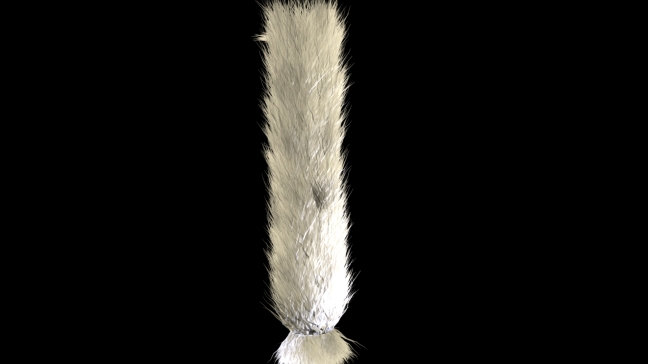
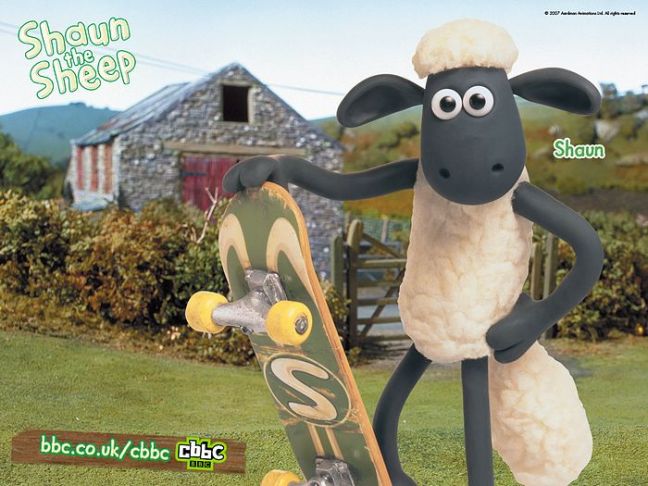
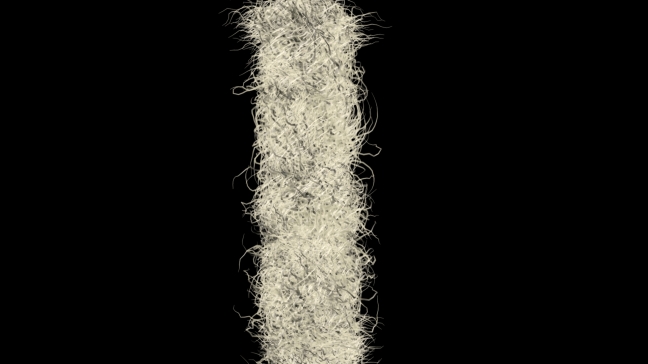

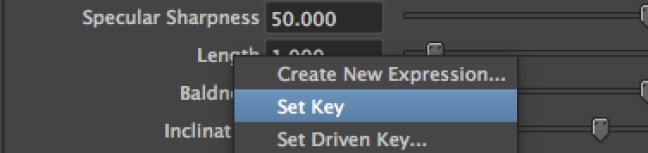
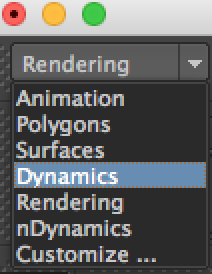
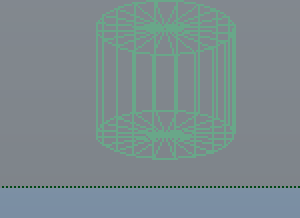
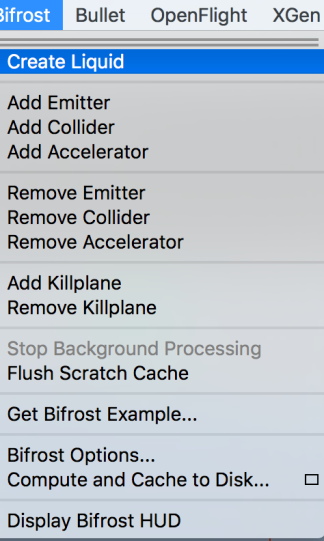
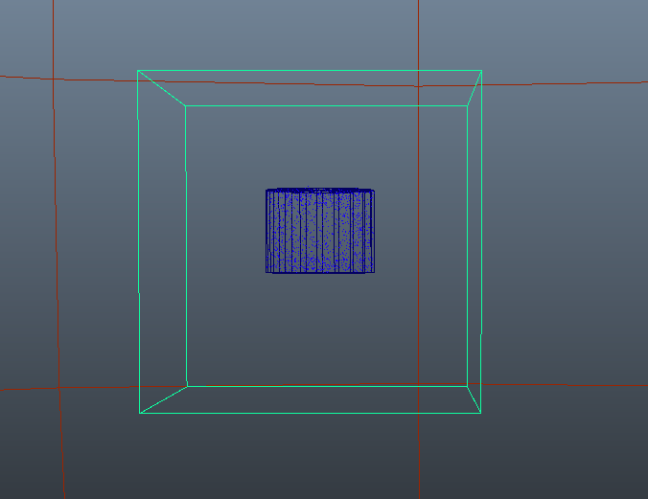

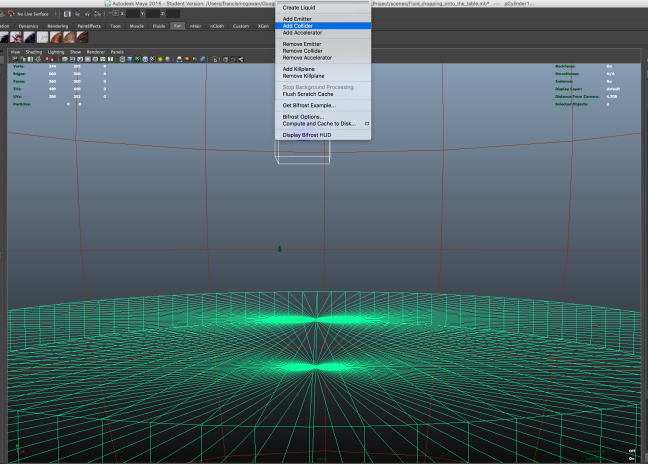


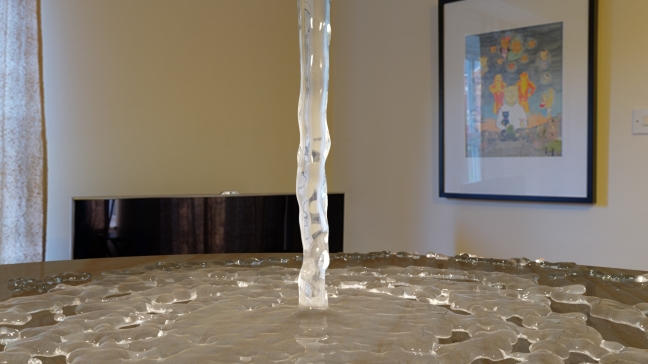
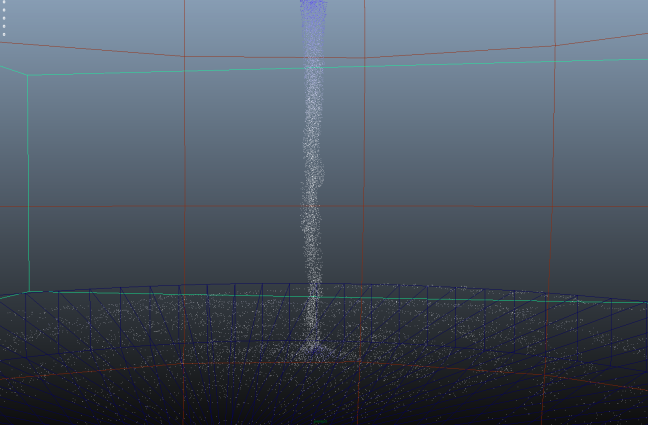
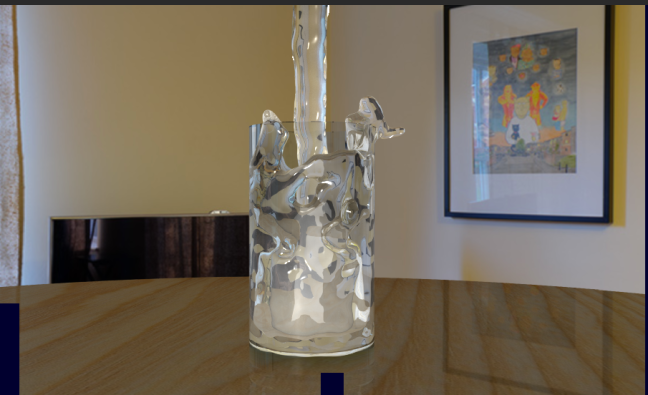
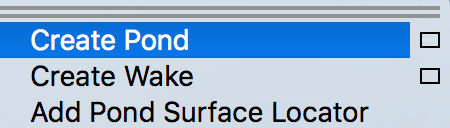
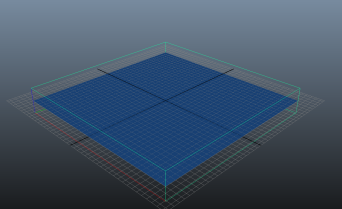


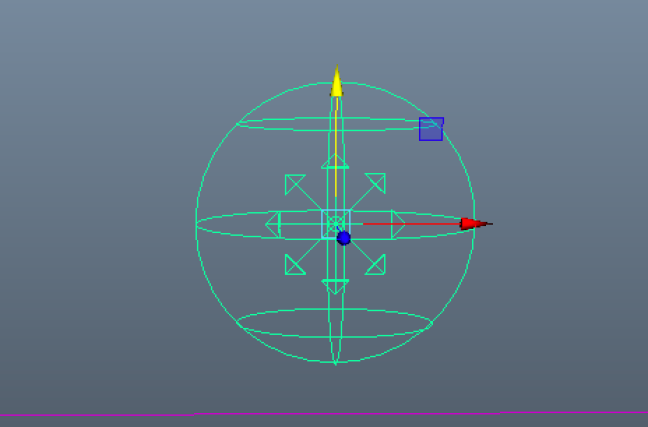
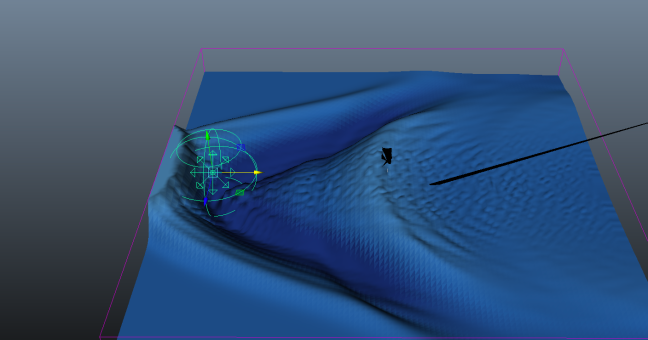


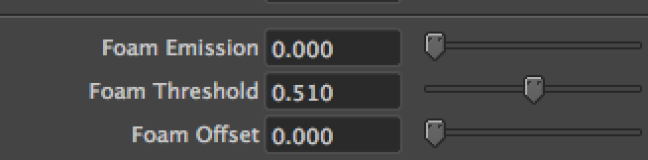
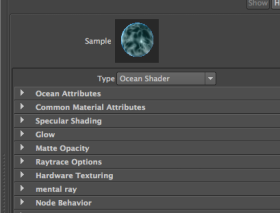
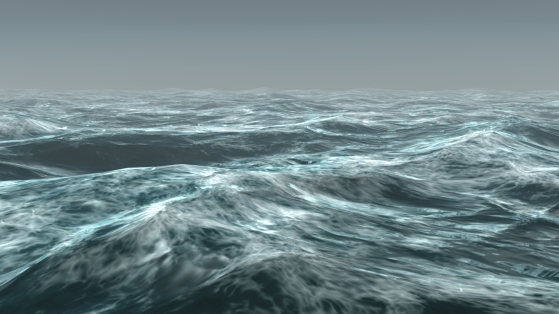
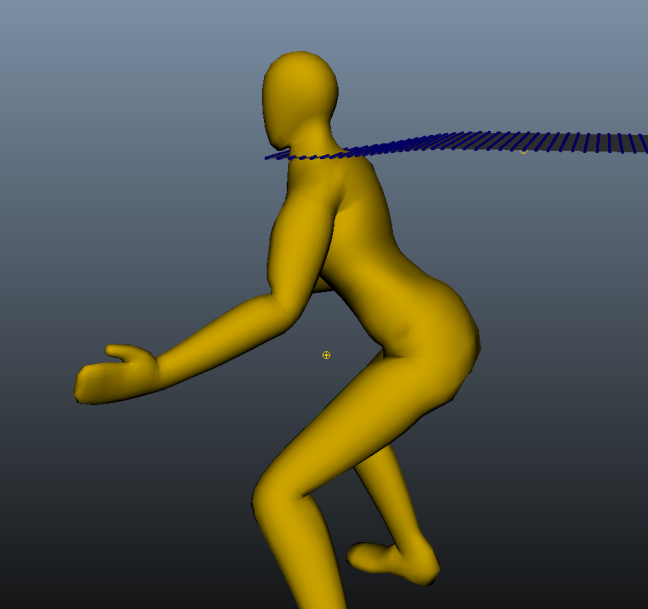
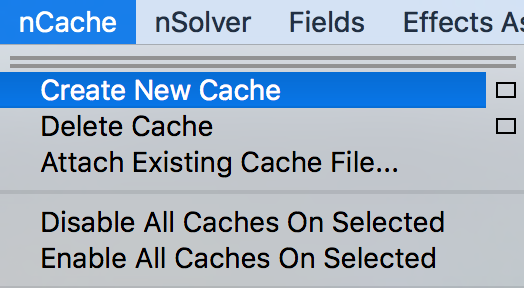
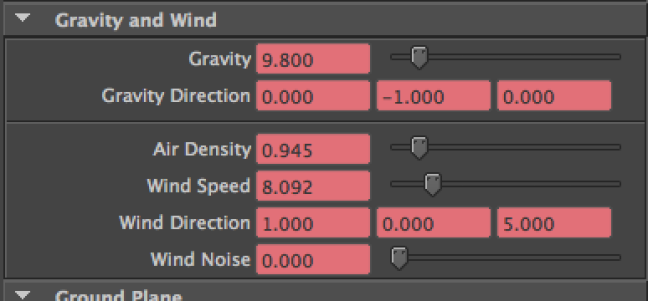
 In particular, particles that start to move along parallel trajectories (as in the above image) will never meet, but are fated to remain forever at a constant distance from one another.
 in which the particles A and B start out in parallel, but are then accelerated towards one another. In
  In that situation, there is no force making the particles deviate from the straightest possible lines; the mere fact that the particles are moving on a sphere means that, even if they still move as straight as possible, their paths will converge.